I’ve been wanting more recipes where mushrooms aren’t there to accompany chicken, beef or another main ingredient.
This is definitely one of them.
Using several varieties together makes more sense to me than simply adding a huge quantity of button mushrooms. Shiitake brings a stronger savoury flavour, king oyster gives the dish a much meatier texture, and Swiss browns are excellent for getting plenty of browned mushroom flavour into the pan.
The important part is cooking them before making the sauce.
If the mushrooms, noodles and sauce all go into the pan together, the mushrooms release water and mostly steam. Instead, I give them plenty of space and let them brown properly first.
Only then do I add garlic, butter and a sauce made from white miso, mirin and soy.
The result is rich and savoury without needing cream, meat or a complicated sauce. And because udon only needs a few minutes, most of the actual cooking time is spent getting the mushrooms right.
This is also exactly the sort of recipe I had in mind when putting together my Cooking with Mushrooms & Fungi guide: choose mushrooms based on what you want them to contribute, rather than treating every mushroom as interchangeable.
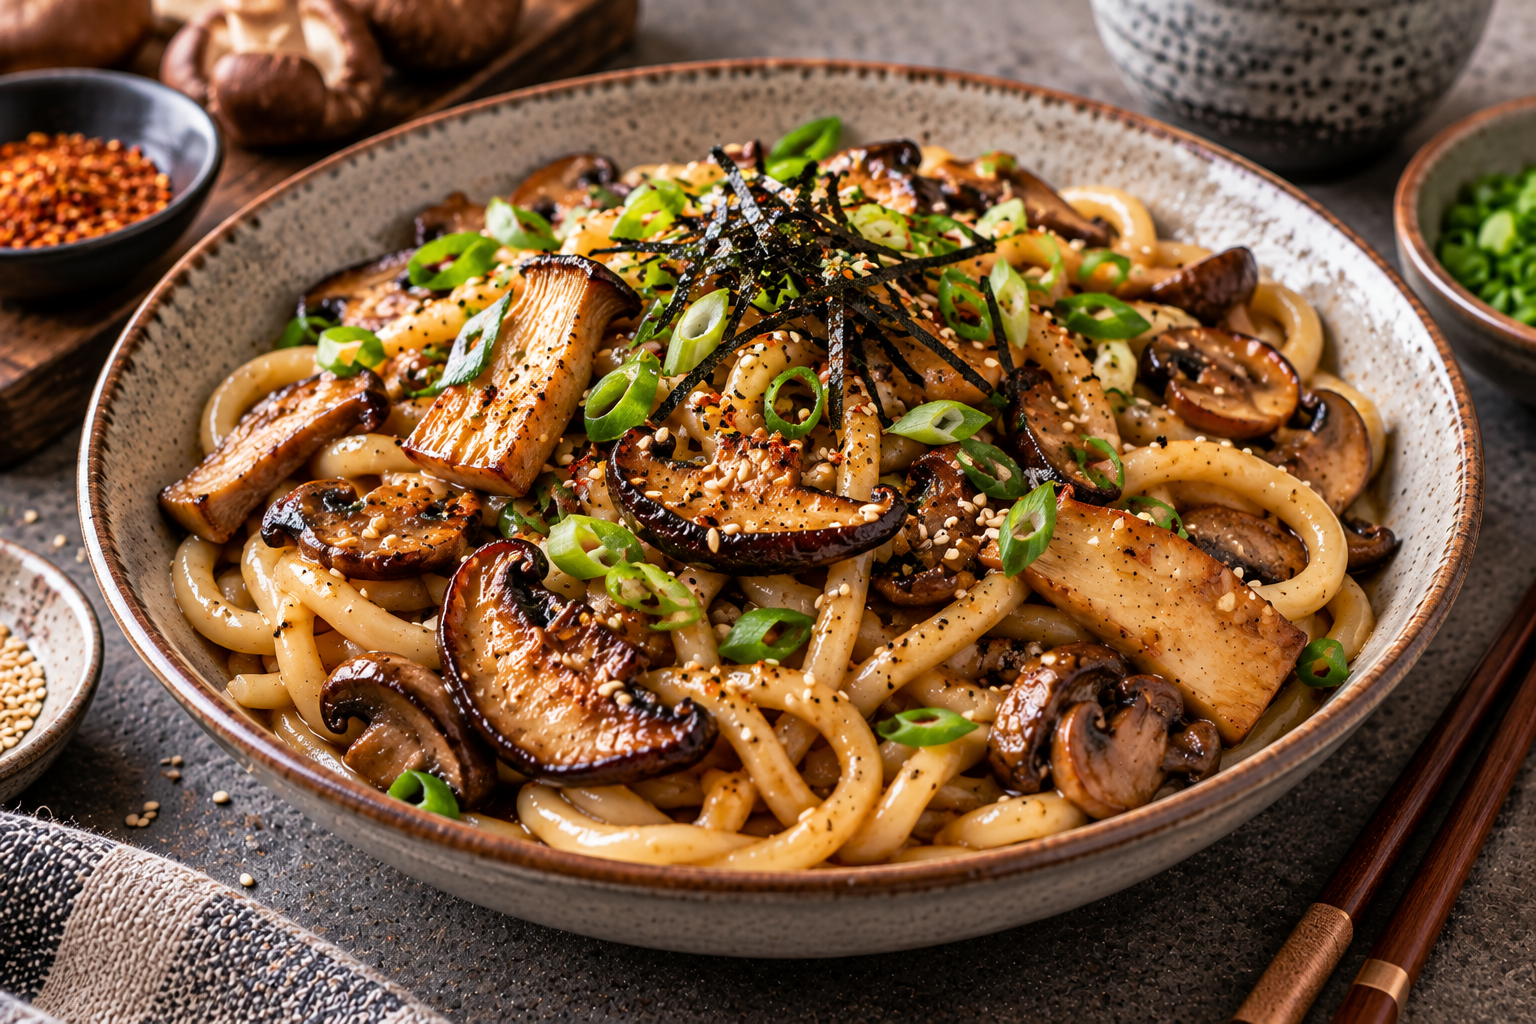
This vegetarian udon uses a mixture of mushrooms browned hard before being tossed with garlic, butter, white miso, mirin and soy.
The mushrooms are treated as the main ingredient rather than an alternative to meat. Browning them properly gives the dish most of its savoury depth, while miso and butter form a rich sauce that clings to the thick udon noodles.
Servings 2
Course Whole Meal
Cuisine Japanese inspired
Ingredients
Mushrooms
150gSwiss brown mushrooms
100gking oyster mushrooms
100gfresh shiitake mushrooms
1tbspneutral cooking oil
15gunsalted butter
2tspminced garlic
Black pepper
Miso Butter Sauce
30gwhite miso pasteabout 1½ tbsp
1tbspmirin
2tsplight soy sauce
1tsprice vinegar
30gunsalted butter
60mlhot water or reserved udon cooking water
Noodles
400gfresh, frozen or vacuum-packed udon noodles
To Finish
2spring onionsfinely sliced
1tsptoasted sesame seeds
Shichimi togarashi or chilli flakesoptional
Norifinely shredded, optional
Method
Prepare the mushrooms
Clean the mushrooms and trim away any tough ends.
Slice the Swiss browns into relatively thick slices.
Remove the tough stems from the shiitake and slice the caps.
Cut the king oyster mushrooms lengthways into thick slices, then cut or tear them into bite-sized pieces.
I actually like tearing some of the king oyster rather than making every piece perfectly uniform. The irregular surfaces create more edges that can brown.
Make the sauce
In a small bowl, combine:
White miso
Mirin
Light soy
Rice vinegar
60 ml hot water
Whisk until the miso has completely dissolved.
Don’t add the 30 g finishing butter yet.
Taste the sauce.
It should seem quite strongly seasoned on its own because it still has to flavour 350 g mushrooms + 400 g udon.
Heat the pan properly
Use your largest frying pan.
Heat it over medium-high to high heat until properly hot.
Add the neutral oil.
Brown the mushrooms
Add the mushrooms in a reasonably open layer.
If your pan isn’t large enough, cook them in two batches.
This matters.
Leave the mushrooms alone for around 2 minutes before moving them.
Toss and continue cooking for another 4–5 minutes, allowing different surfaces to make contact with the hot pan.
You’re looking for genuinely browned edges rather than simply softened mushrooms.
If they’ve released a lot of water, keep cooking until that moisture has evaporated.
Add the first butter
Reduce the heat slightly.
Add 15 g butter and toss it through the browned mushrooms.
Add the garlic and plenty of black pepper.
Cook for around 30 seconds, just until the garlic becomes fragrant.
The mushrooms should now be glossy and deeply browned.
Transfer them temporarily to a plate if you’re worried they’ll overcook while preparing the noodles.
Prepare the Udon
Loosen the noodles
Prepare the udon according to the packet directions.
Fresh or vacuum-packed udon usually only needs a short time in boiling water to loosen.
Don’t aggressively boil it for several minutes unless the particular noodles you’re using require it.
Before draining, reserve a little cooking water.
Drain well.
Bring Everything Together
Add the sauce
Return the mushrooms to the pan if you removed them.
Keep the heat around medium.
Pour in the miso mixture.
Let it bubble for approximately 30–60 seconds.
You’re not trying to reduce this into a thick glaze before adding the noodles.
Add the udon
Add the drained udon.
Toss everything together until the noodles are completely coated and the mushrooms are distributed throughout.
Cook for approximately 1–2 minutes.
If the sauce becomes too thick, add another splash of udon water.
If it looks watery, keep tossing over the heat for another 30 seconds.
The starch from the noodles will help the sauce cling.
Finish with butter
Turn off the heat.
Add the remaining 30 g cold butter.
Toss vigorously until the butter melts and emulsifies with the miso sauce.
This is the point where the sauce should become glossy and coat the udon rather than sitting as watery liquid at the bottom of the pan.
Taste before adding any salt.
Between the miso and soy sauce, you probably won’t need it.
Finish
Add most of the sliced spring onion and toss briefly.
Divide between two bowls.
Top with the remaining spring onion and sesame seeds.
If you want some heat, finish with a little shichimi togarashi.
Finely shredded nori also works particularly well here.
Meatballs in tomato sauce are simple enough in theory, but there are quite a few little decisions that change the result.
I’ve gone with a mixture of beef and pork rather than beef alone. The beef gives the meatballs plenty of flavour while the pork adds some extra fat and keeps the texture softer.
I also don’t want to pack the mixture together too aggressively. I’m after meatballs that hold their shape when browned but are still tender once you cut into them.
The other important part is the sauce. Rather than cooking the meatballs completely in the frying pan, I brown them first and then let them finish gently in the tomato sauce. You get the flavour from browning without having to keep frying them until the centres are cooked.
It’s not the fastest pasta dinner I’ve made, but most of the work is straightforward and you end up with something considerably better than simply dropping cooked mince into tomato sauce.
And if I’m making meatballs, I might as well make enough to have leftovers.
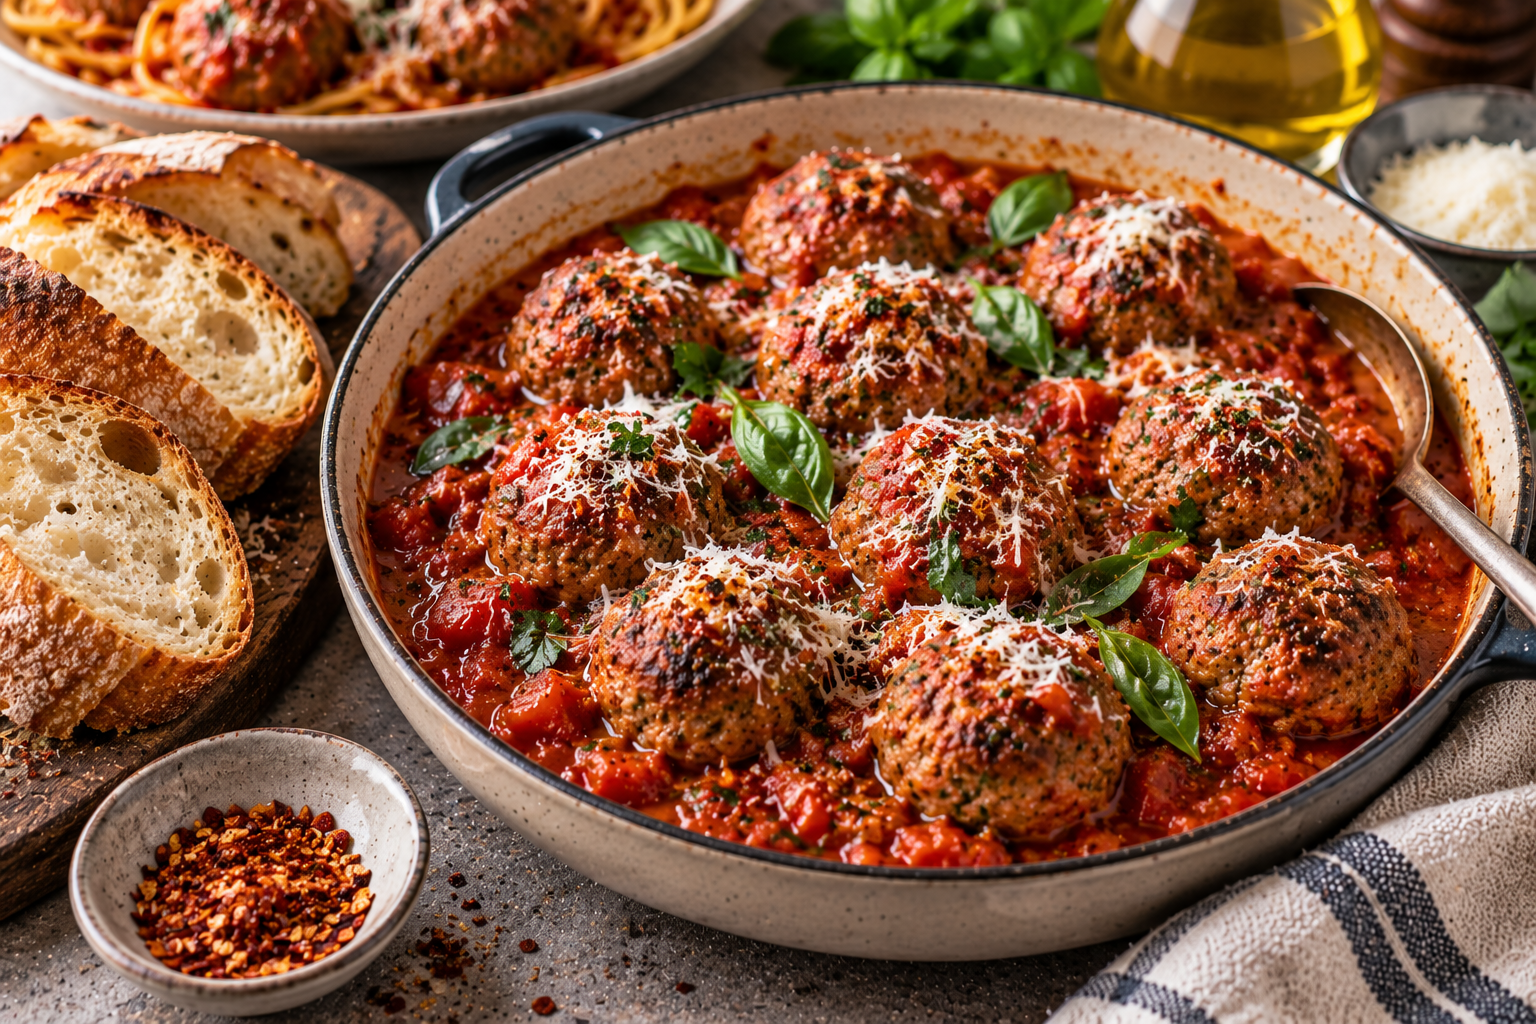
These Italian-style meatballs combine beef and pork mince with Parmesan, garlic, parsley and breadcrumbs. They’re browned first for flavour, then gently simmered in a simple tomato sauce until tender.
Serve them with spaghetti for a complete meal, or skip the pasta and bring plenty of crusty bread to the table instead.
Servings 4
Course Whole Meal
Cuisine Italian inspired
Ingredients
Beef & Pork Meatballs
300gbeef mince
300gpork mince
60gfresh breadcrumbs
80mlmilk
1large egg
40gParmesanfinely grated
3tspminced garlic
3tbspfinely chopped flat-leaf parsley
1tspdried oregano
1tspsalt
½tspblack pepper
1tbspolive oilfor browning
Tomato Sauce
1tbspextra virgin olive oil
1medium brown onionfinely diced
3tspminced garlic
800gcanned whole peeled tomatoes
1tbsptomato paste
1tspdried oregano
½tspchilli flakesoptional
100mlwater
Salt and black pepperto taste
Small handful fresh basil
To Serve
375gspaghetti
30–40 g Parmesanfinely grated
Fresh basil or parsley
Extra virgin olive oiloptional
Method
Soak the breadcrumbs
Place the breadcrumbs in a large mixing bowl.
Pour over the milk and mix.
Leave for around 5 minutes until the breadcrumbs have absorbed the milk and softened.
This becomes a simple panade and is one of the things helping keep the meatballs tender.
Make the meatball mixture
Add the beef, pork, egg, Parmesan, garlic, parsley, oregano, salt and black pepper to the soaked breadcrumbs.
Mix everything together gently with your hands.
You want all the ingredients evenly distributed, but don’t knead the mixture aggressively.
The more you compact the mince, the firmer and more sausage-like the finished meatballs become.
Test the seasoning
Before shaping everything, take a teaspoon of the mixture and cook it in a small frying pan.
Taste it.
This gives you the opportunity to adjust the salt, pepper or herbs before you’ve committed to 20 meatballs.
With Parmesan already in the mixture, I’d be particularly careful about automatically adding more salt.
Shape the meatballs
Divide the mixture into approximately 20 portions, around 35–40 g each.
Roll gently into balls.
Don’t squeeze them into perfectly dense spheres.
Place on a plate or tray and refrigerate for 15–20 minutes if you have time.
This helps them firm up before browning.
Make the Tomato Sauce
Cook the onion
Heat 1 tablespoon EVOO in a large deep frying pan or shallow casserole over medium heat.
Add the onion with a small pinch of salt.
Cook for approximately 5–7 minutes, stirring occasionally, until soft and translucent.
Add the garlic and cook for another 30 seconds.
Cook the tomato paste
Add the tomato paste.
Cook for around 1 minute, stirring it through the onion and garlic.
I like giving tomato paste a little direct heat rather than immediately diluting it with tomatoes.
Add the tomatoes
Crush the whole tomatoes by hand or with a spoon and add them with their juices.
Add the oregano, optional chilli flakes and 100 ml water.
Bring to a gentle simmer.
Cook uncovered for around 10 minutes while you brown the meatballs.
Brown the Meatballs
Heat the pan
Heat a separate large frying pan over medium-high heat.
Add 1 tablespoon olive oil.
You don’t need enough oil to deep-fry the meatballs. We’re just trying to develop colour.
Brown in batches
Add the meatballs without overcrowding the pan.
Brown for around 4–5 minutes total, turning carefully so several sides develop colour.
They don’t need to be cooked through.
Transfer the browned meatballs to a plate and repeat with the remaining batch.
Don’t waste the browned bits
Once the meatballs are finished, there should be browned meat and juices stuck to the frying pan.
Add a small splash of water to the hot pan.
Scrape everything up with a wooden spoon.
Pour that liquid into the tomato sauce.
That’s flavour you already created. There’s no reason to wash it down the sink.
Finish the Meatballs in the Sauce
Add the meatballs
Carefully place the browned meatballs into the simmering tomato sauce.
Spoon some sauce over the tops.
They don’t need to be completely submerged.
Simmer gently
Reduce the heat to low.
Partially cover and simmer for approximately 15–20 minutes, gently turning the meatballs once if necessary.
Avoid aggressively stirring the pot.
The meatballs are considerably more delicate than pieces of braising meat.
Once cooked through, remove the lid and let the sauce reduce for another 5 minutes if it seems too thin.
Finish the sauce
Tear in the fresh basil.
Taste the sauce before seasoning.
The meatballs will have released seasoned juices, Parmesan and pork fat into the tomatoes, so the sauce at this point won’t taste exactly as it did before the meatballs went in.
Adjust salt, pepper and chilli if required.
Cook the Spaghetti
Boil the pasta
Bring a large pot of well-salted water to the boil.
Cook the 375 g spaghetti until just al dente.
Before draining, reserve around 250 ml pasta water.
Sauce the pasta
This is where I’d do something slightly differently from simply dumping meatballs onto plain spaghetti.
Remove the meatballs temporarily from the tomato sauce.
Transfer the drained spaghetti into the sauce.
Add a small splash of pasta water and toss over medium heat for around 1 minute.
The spaghetti should be properly coated in tomato sauce.
Add more pasta water only if needed.
Serve
Twirl the tomato-coated spaghetti onto each plate.
Add 4–5 meatballs per person.
Spoon additional tomato sauce over the top.
Finish with freshly grated Parmesan, basil or parsley and black pepper.
A small drizzle of good EVOO at the table is optional.
This is exactly the sort of recipe that reminds me that a short ingredient list doesn’t necessarily mean there’s nothing to think about.
Gambas al Ajillo is basically prawns, olive oil, garlic and chilli. There isn’t a complicated marinade or sauce hiding behind it. Most of the flavour comes from getting those few ingredients right.
The garlic is the part I pay the most attention to. I want it gently sizzling in the olive oil long enough to flavour the oil and turn lightly golden, but not so dark that it becomes bitter. The prawns then go in for only a couple of minutes, just long enough to cook through while staying juicy.
I’ve added parsley and a little lemon at the end, but otherwise I want to keep this simple.
And the olive oil left in the dish isn’t something to drain away. Once it’s picked up the garlic, chilli and prawn juices, it’s arguably one of the best parts.
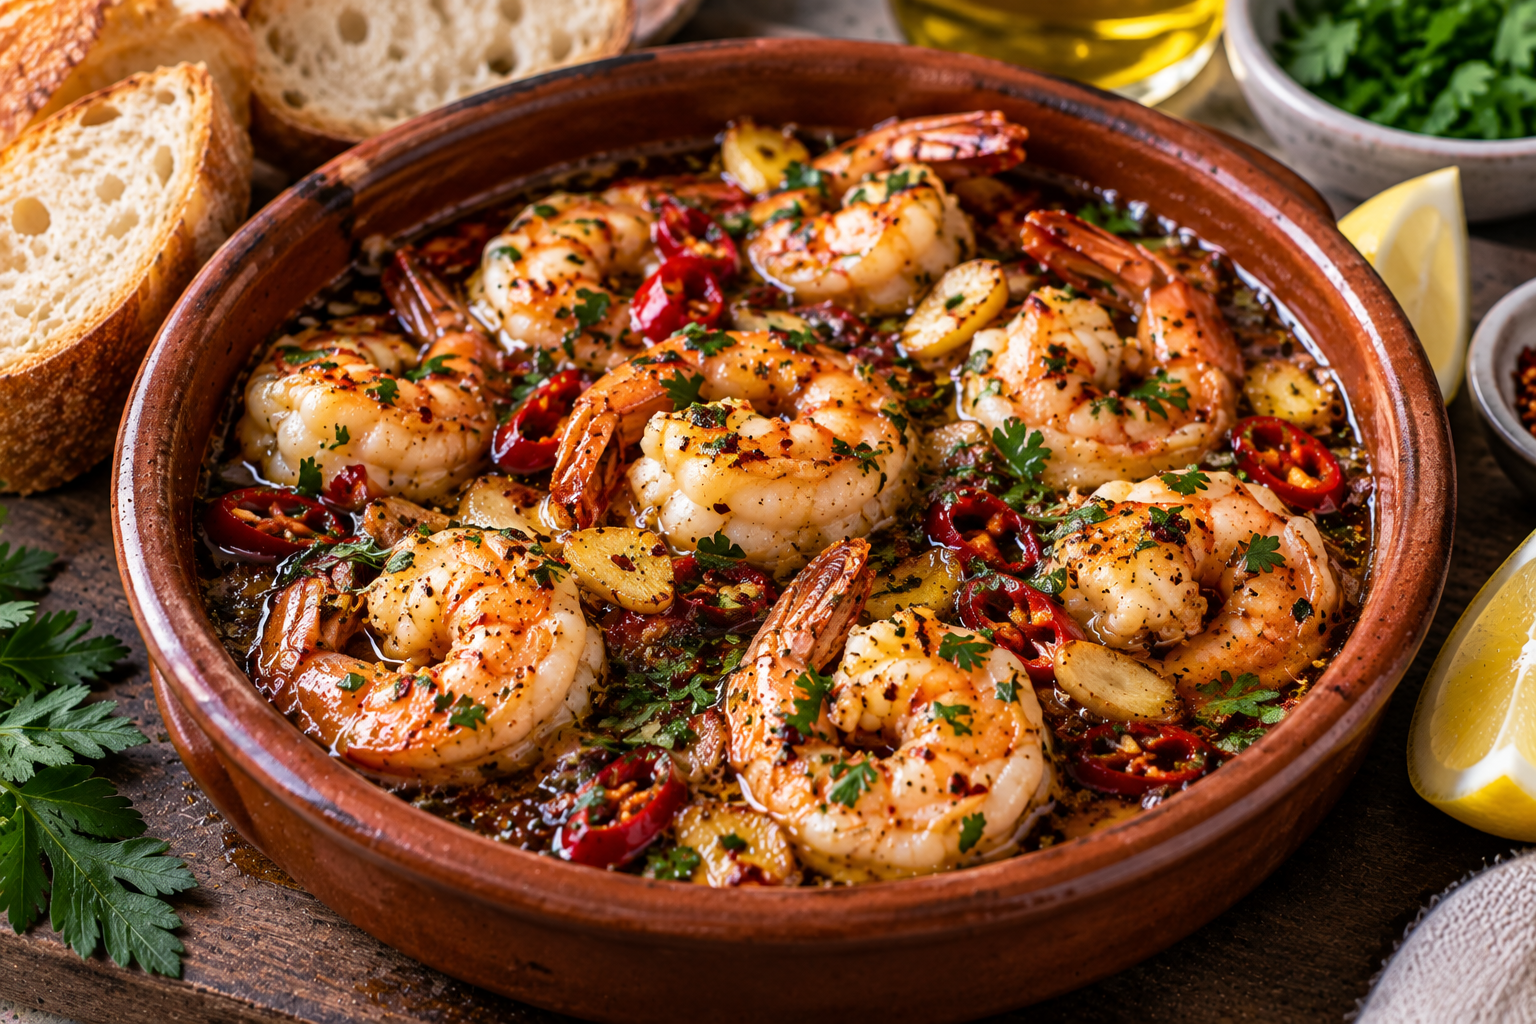
Gambas al Ajillo is a classic Spanish tapas dish built from remarkably few ingredients: prawns, olive oil, garlic and chilli.
The trick is controlling the heat. The garlic needs enough time to flavour the olive oil and become lightly golden without burning, while the prawns need only a very short cook so they stay juicy.
Pad Kra Pao is one of those dishes that looks almost too simple when you break down the ingredients.
Chicken, garlic, chilli, a few sauces and a big handful of basil. But cooked quickly over high heat, it becomes much more than the ingredient list suggests.
The part I like is that the chicken isn’t supposed to be swimming in sauce. I want some of the mince to actually brown against the hot pan before adding the seasonings, then let the sauce reduce until it coats the meat.
Traditionally, the defining herb is holy basil, which has a more peppery flavour than the Thai basil that’s much easier for me to find. I’ll use holy basil when I can get it, but I’m not going to avoid making the dish because I only have Thai basil.
The crispy egg is almost as important to me as the chicken. Fried in enough oil to blister and crisp the edges while leaving the yolk runny, it gives you something rich to break over the spicy, salty chicken and rice.
This is my practical version for making at home, with enough chilli to know it’s there and very little added sweetness.
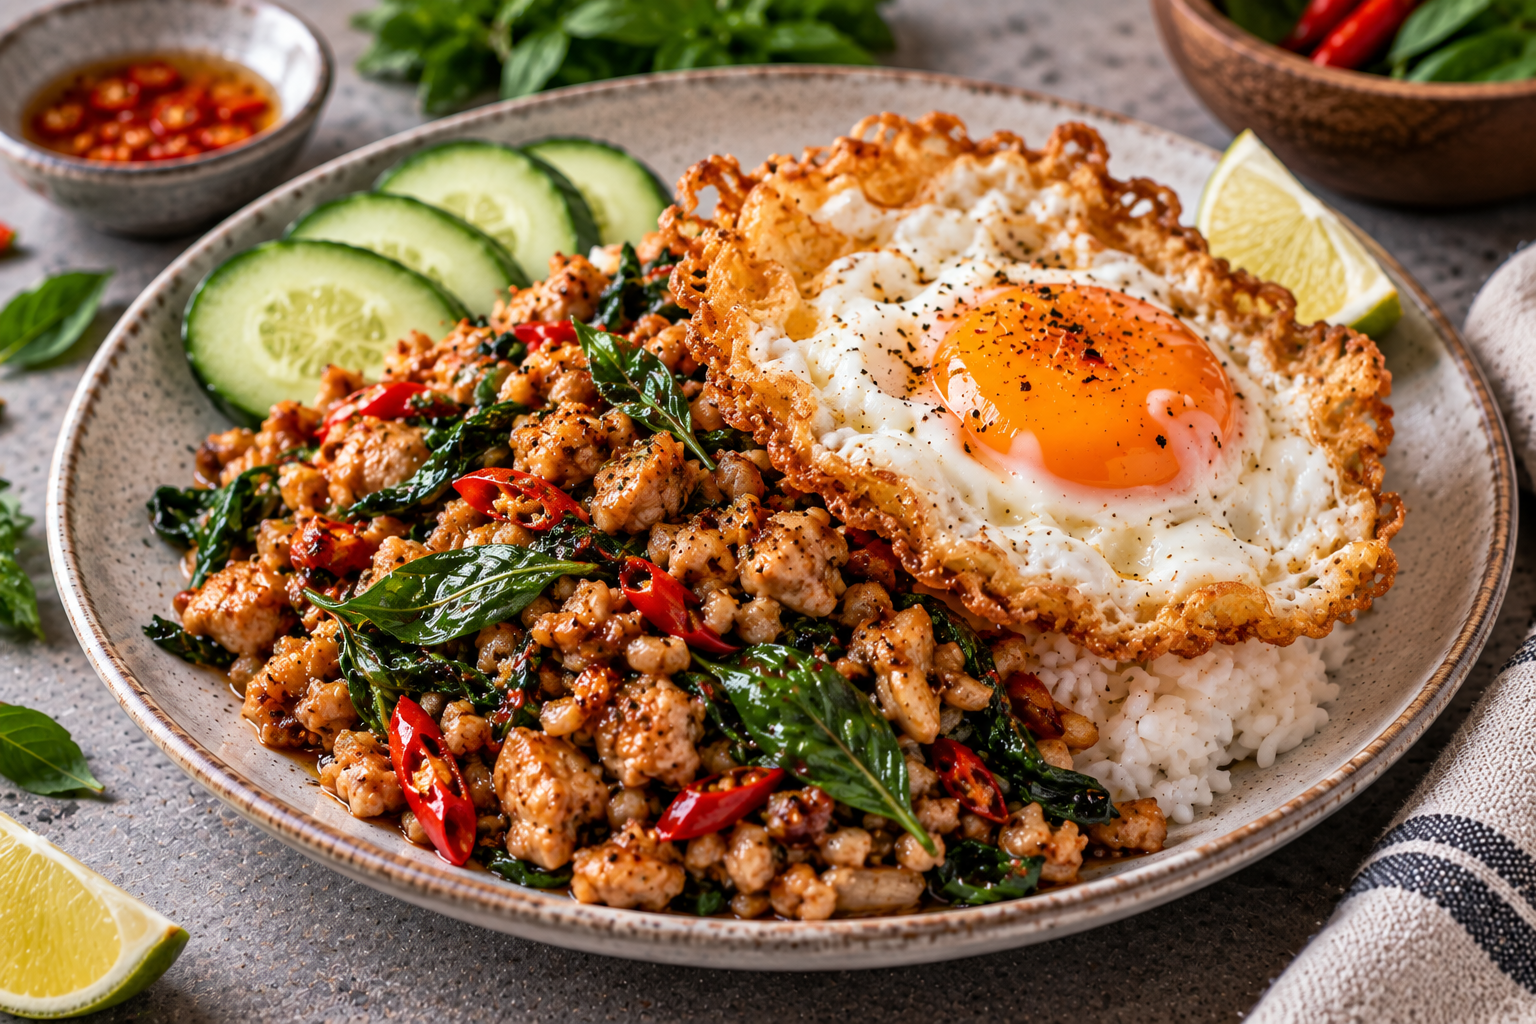
Basil Chicken (Pad Kra Pao) with Rice & Crispy Egg
Pad Kra Pao is built around a very simple combination: minced meat stir-fried hard and fast with garlic, chilli and basil, then served over rice with a fried egg.
This version uses chicken mince with fish sauce, oyster sauce and light soy, keeping the sauce savoury rather than overly sweet. A crispy-edged fried egg with a runny yolk turns it into a complete meal.
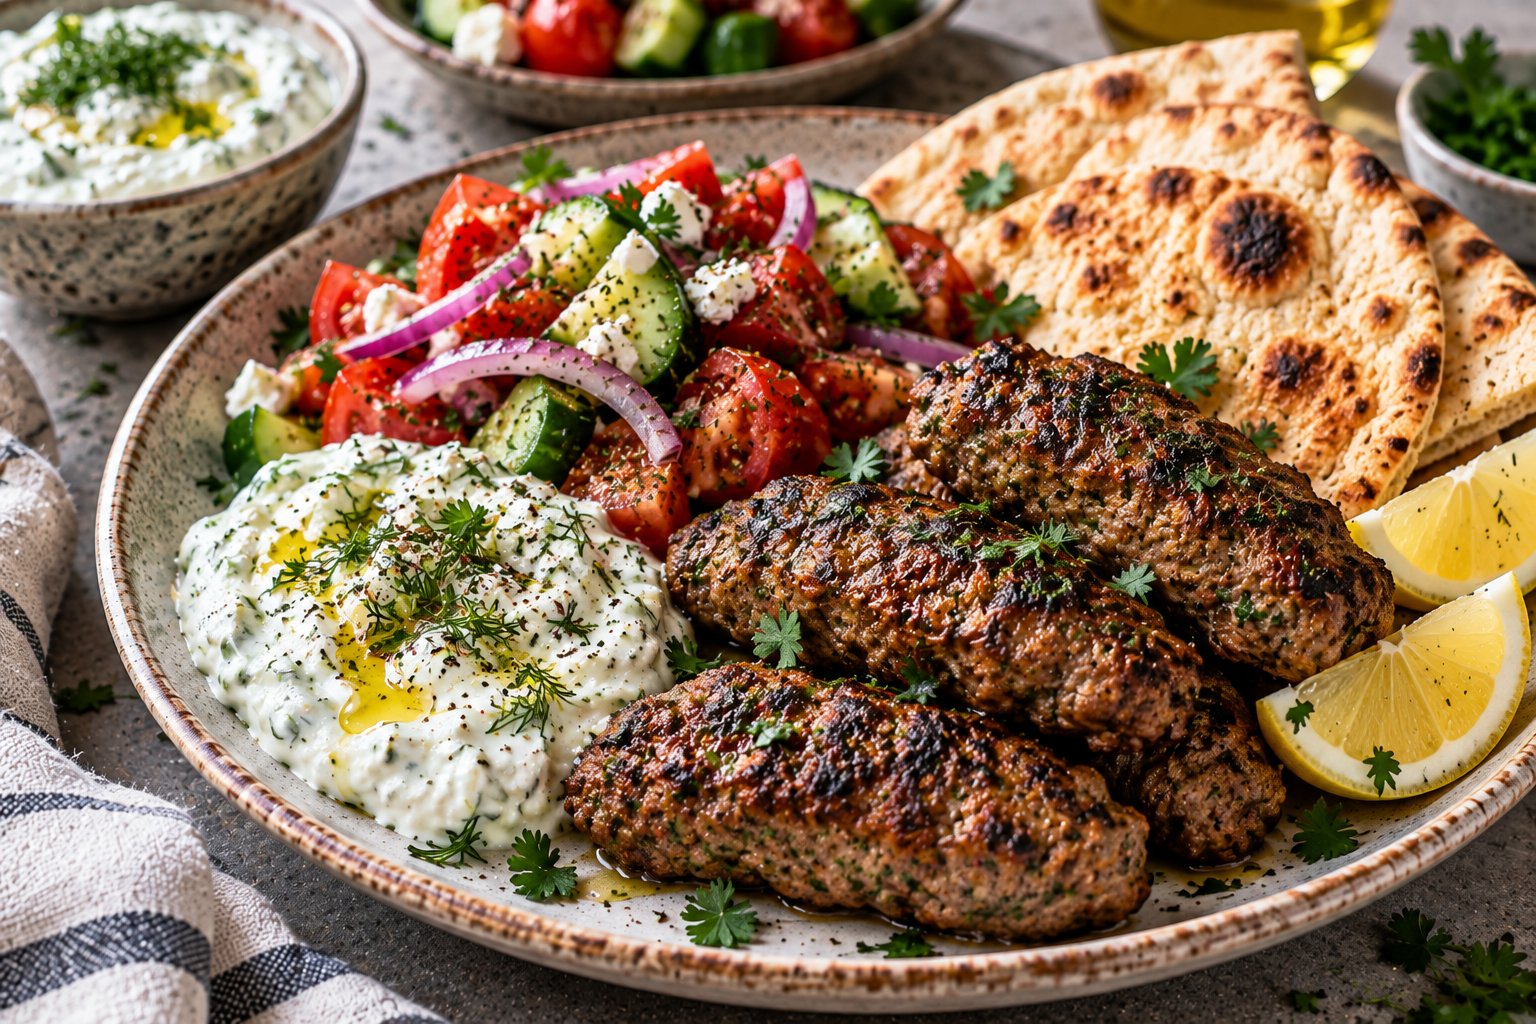
A Mediterranean-style plate built around beef kofta seasoned with garlic, cumin, coriander, oregano and parsley. Serve the kofta with homemade tzatziki, a simple tomato and cucumber salad, warm pita and lemon for a complete meal that’s fresh enough for lunch but substantial enough for dinner.
A Mediterranean-style plate built around beef kofta seasoned with garlic, cumin, coriander, oregano and parsley. Serve the kofta with homemade tzatziki, a simple tomato and cucumber salad, warm pita and lemon for a complete meal that’s fresh enough for lunch but substantial enough for dinner.
Place it in your hands, a clean tea towel or some paper towel and squeeze out as much liquid as reasonably possible.
This matters more than it might seem. Leaving all that cucumber water in there can turn thick Greek yoghurt into a watery sauce.
Combine the cucumber with the yoghurt, garlic, olive oil, lemon juice, dill, salt and black pepper.
Taste and adjust the seasoning.
Refrigerate while you prepare everything else.
If possible, make it 30 minutes ahead so the garlic and dill have time to flavour the yoghurt.
Prepare the onion for the kofta
Finely grate the brown onion.
Squeeze out some of the excess liquid before adding it to the beef.
You still want the flavour and some moisture, but not enough onion juice to make the mixture sloppy.
Mix the kofta
Place the beef mince in a large bowl.
Add the grated onion, garlic, parsley, cumin, coriander, oregano, paprika, salt, pepper and olive oil.
Mix with your hands until everything is evenly distributed.
Don’t spend several minutes aggressively kneading it. Once the mixture holds together and the seasoning is distributed, stop.
Shape
Divide the mixture into 8 kofta, about 75 g each.
Shape each portion into a short sausage around 8–10 cm long.
Flatten them slightly rather than making perfectly round cylinders. That gives you more surface area for browning and makes them easier to cook evenly in a pan or air fryer.
You can also shape them around skewers, but for an ordinary weeknight dinner I wouldn’t bother unless you’re grilling them over a barbecue.
Rest
Place the shaped kofta in the refrigerator for around 15–20 minutes.
This isn’t essential, but it helps them firm up and hold their shape during cooking.
Use the time to make the salad.
Make the salad
Combine the tomato, cucumber and red onion.
Add the olive oil, lemon juice, oregano, salt and black pepper.
Toss just before serving.
I wouldn’t dress this too early because the salt will start pulling water from the tomato and cucumber.
Cooking the Kofta
You have several good options.
Air Fryer
This is probably how I’d cook them at home.
Preheat to 200°C.
Lightly spray or brush the kofta with oil.
Air fry for approximately 8–10 minutes, turning once.
Then increase to 220–230°C for another 1–2 minutes if they need more browning.
You’re looking for a properly browned exterior without drying out the middle.
Frying Pan
Heat a heavy frying pan over medium-high heat.
Add a small amount of olive oil.
Cook the kofta for approximately 8–10 minutes, turning every couple of minutes so several sides develop good colour.
Barbecue
Cook over medium-high direct heat for around 8–10 minutes, turning regularly.
This is probably the best option if you’re already using the barbecue because a little char works extremely well with the cumin, oregano and beef.
Whichever method you use, cook minced beef thoroughly.
Warm the Pita
Heat the pita in a dry frying pan for around 30 seconds per side, or until warm and flexible.
Alternatively, wrap several together and warm them briefly in the oven or air fryer.
I prefer them soft rather than crisp for this meal because I want to be able to tear pieces off and wrap them around the kofta.
Assemble the Plate
Give each person:
2 beef kofta
A generous spoonful of tzatziki
Tomato and cucumber salad
1 warm pita
Lemon wedges
Scatter over some fresh parsley.
Add a little crumbled feta if you want it, although I don’t think the plate actually needs it.
Squeeze lemon over the kofta immediately before eating.
This is exactly the sort of dish that made me want to understand ingredients rather than just follow recipes.
Chicken, mushrooms, white wine, butter and thyme is a fairly classic combination, but most of what makes this dish work actually happens in the pan.
The chicken leaves behind browned bits. The mushrooms pick up some of the rendered chicken fat and develop their own colour. White wine then deglazes the pan and, rather than immediately adding everything else, I let it reduce before adding the stock.
That reduction is important. The wine isn’t there just because “French cooking uses wine.” It brings acidity and aroma, lifts everything stuck to the bottom of the pan and becomes part of the sauce.
I’ve kept this version without cream. Finishing with a little cold butter gives the sauce enough richness while still letting the mushrooms, chicken and wine remain the main flavours.
It’s also a good practical example of two ingredients I’ve been looking at more closely lately: mushrooms and alcohol.
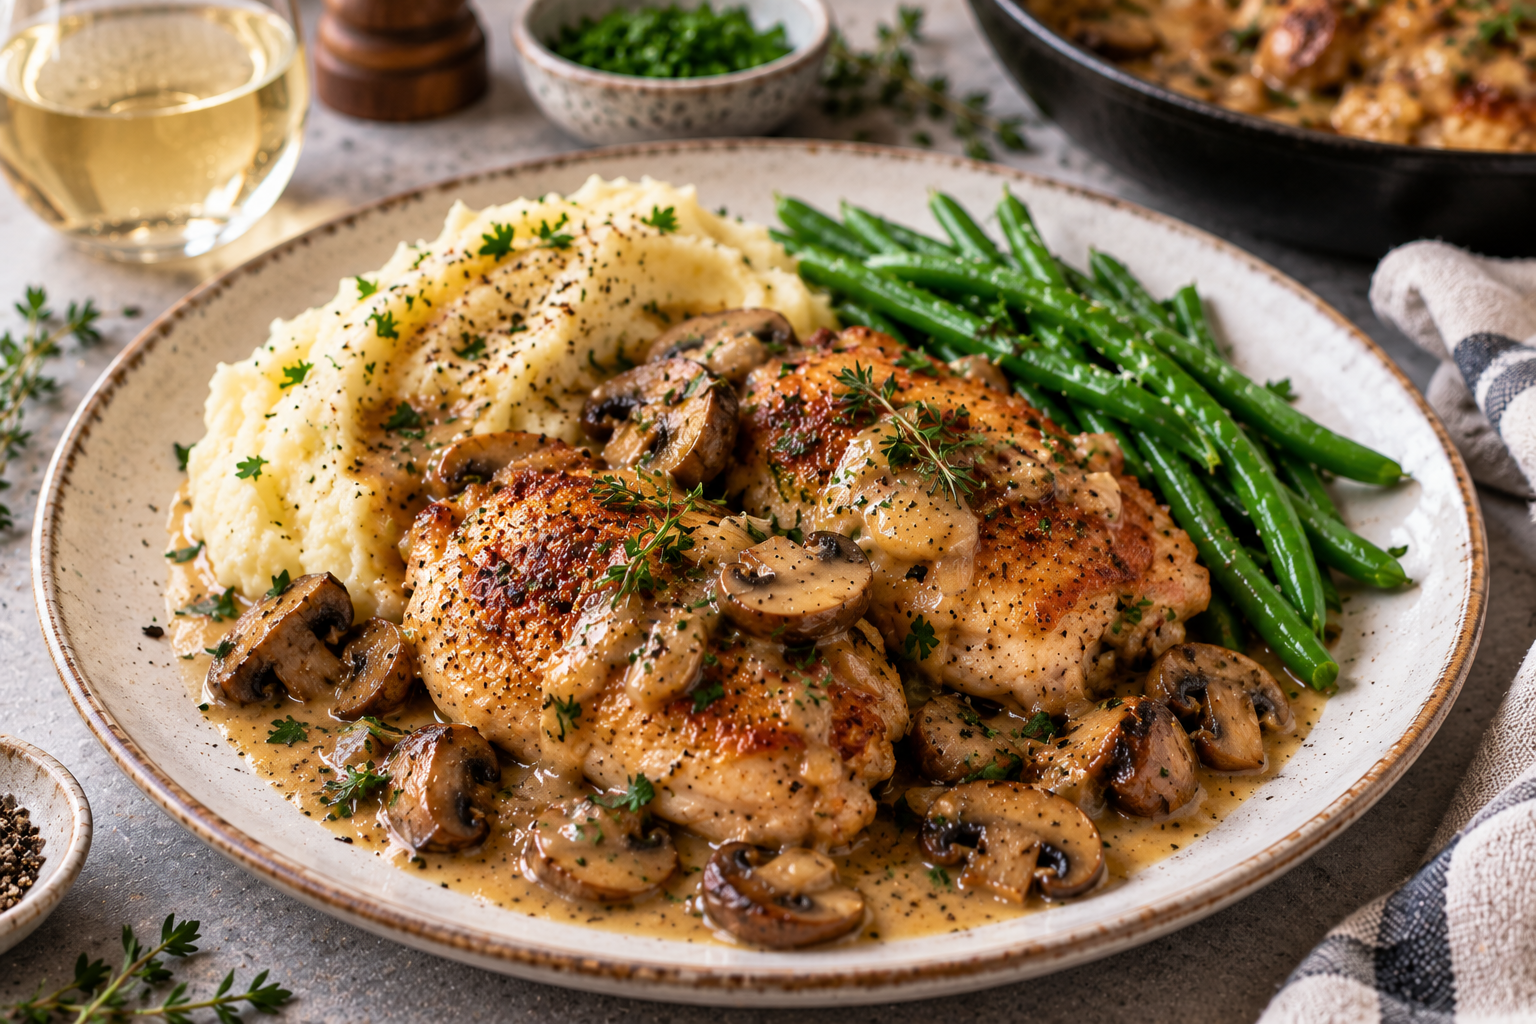
Chicken thighs are browned until golden, then finished with mushrooms, garlic, thyme and a dry white wine pan sauce. The wine is reduced before the stock is added, concentrating its acidity and flavour while pulling all the browned bits from the pan into the sauce.
Course Whole Meal
Cuisine French inspired
Ingredients
Chicken
700–800 g bonelessskinless chicken thighs
1tbspolive oil
¾tspsalt
½tspblack pepper
Mushrooms
300gmushroomssliced
1small shallotfinely diced
2tspminced garlic
4sprigs fresh thymeor ½ tsp dried thyme
White Wine Pan Sauce
150mldry white wine
150mlchicken stock
1tspDijon mustard
20gcold unsalted butter
1tsplemon juiceonly if needed
Salt and black pepperto taste
To Serve
Mashed potato
Steamed or blanched green beans
Fresh parsleyfinely chopped
Method
Prepare the chicken
Pat the chicken thighs dry.
Season both sides with salt and black pepper.
If some thighs are substantially thicker than others, flatten them slightly so they cook at roughly the same rate.
Brown the chicken
Heat a large frying pan over medium-high heat.
Add the olive oil.
Place the chicken into the hot pan without overcrowding it and cook for approximately 4–5 minutes on the first side without constantly moving it.
Turn and cook for another 3 minutes.
You’re mainly developing colour at this stage. The chicken doesn’t need to be completely cooked through.
Transfer to a plate.
Brown the mushrooms
Check how much fat is left in the pan.
You want enough to lightly coat the mushrooms, but not a large pool. Remove excess chicken fat if necessary.
Increase the heat slightly and add the mushrooms.
Spread them across the pan and leave them alone for 2–3 minutes before tossing.
Continue cooking for another 3–4 minutes until well browned.
This is one part I wouldn’t rush. Pale, steamed mushrooms and properly browned mushrooms produce very different sauces.
Add the aromatics
Reduce the heat to medium.
Add the shallot and thyme and cook for around 2 minutes.
Add the garlic and cook for another 30 seconds.
Don’t let the garlic burn.
Deglaze with white wine
Pour in the 150 ml white wine.
It should immediately begin bubbling.
Use a wooden spoon to scrape the browned chicken and mushroom bits from the bottom of the pan.
That’s all going into the sauce.
Let the wine simmer uncovered until reduced by roughly half, about 3–5 minutes depending on the size of your pan.
Don’t rush straight into adding the stock.
I want the wine to concentrate first.
Build the sauce
Add the chicken stock and Dijon mustard.
Stir until combined and bring back to a gentle simmer.
Return the chicken and any juices collected on the plate to the pan.
Finish cooking the chicken
Simmer gently for approximately 5–8 minutes, depending on the thickness of the thighs, until the chicken is cooked through.
If the sauce is reducing too quickly, lower the heat.
If the chicken finishes before the sauce reaches the consistency you want, remove the chicken and keep it warm while reducing the sauce for another minute or two.
Finish with butter
Remove the chicken again or push it towards the edge of the pan.
Take the pan off the heat.
Add the 20 g cold butter and swirl or stir it through the sauce until completely incorporated.
This gives the sauce gloss and richness without needing cream.
Taste.
Only add the lemon juice if the sauce actually needs more acidity. Depending on the wine you’ve used, it may already have plenty.
Adjust salt and black pepper.
Serve
Spoon mashed potato onto the plate.
Add the chicken and green beans.
Spoon the mushrooms generously around and over the chicken, followed by the white wine pan sauce.
Finish with chopped parsley and a little freshly cracked black pepper.
Eggs and yoghurt weren’t a combination I’d naturally think to put together, but Turkish eggs make a lot more sense once everything is on the plate.
The yoghurt is seasoned with garlic and salt, the eggs are softly poached, and then hot butter flavoured with paprika and chilli is spooned over everything. Break the yolk and it mixes with the yoghurt and spiced butter into something that’s almost a sauce.
It’s also a good example of a meal where relatively ordinary ingredients become something quite different without needing much cooking.
For my version, I’m keeping the garlic yoghurt simple and using paprika with chilli flakes in the butter. Traditionally, Turkish pul biber or Aleppo-style pepper would be the more characteristic choice, but paprika and chilli are ingredients I’m much more likely to already have.
Serve it with warm flatbread or toasted sourdough and use the bread to scoop up the yoghurt, butter and runny yolk together.
I’ve cooked with smoked paprika and chilli plenty of times, but chipotle brings something quite different. You get chilli heat and smokiness together, but with a deeper flavour that works particularly well with tomato.
Chicken tinga seemed like a good place to start.
Traditional tinga has several regional and household variations, but chicken cooked with tomato, onion and chipotle is probably the version most people recognise. For mine, I’m using chicken thigh because it stays juicy after being shredded and returned to the sauce.
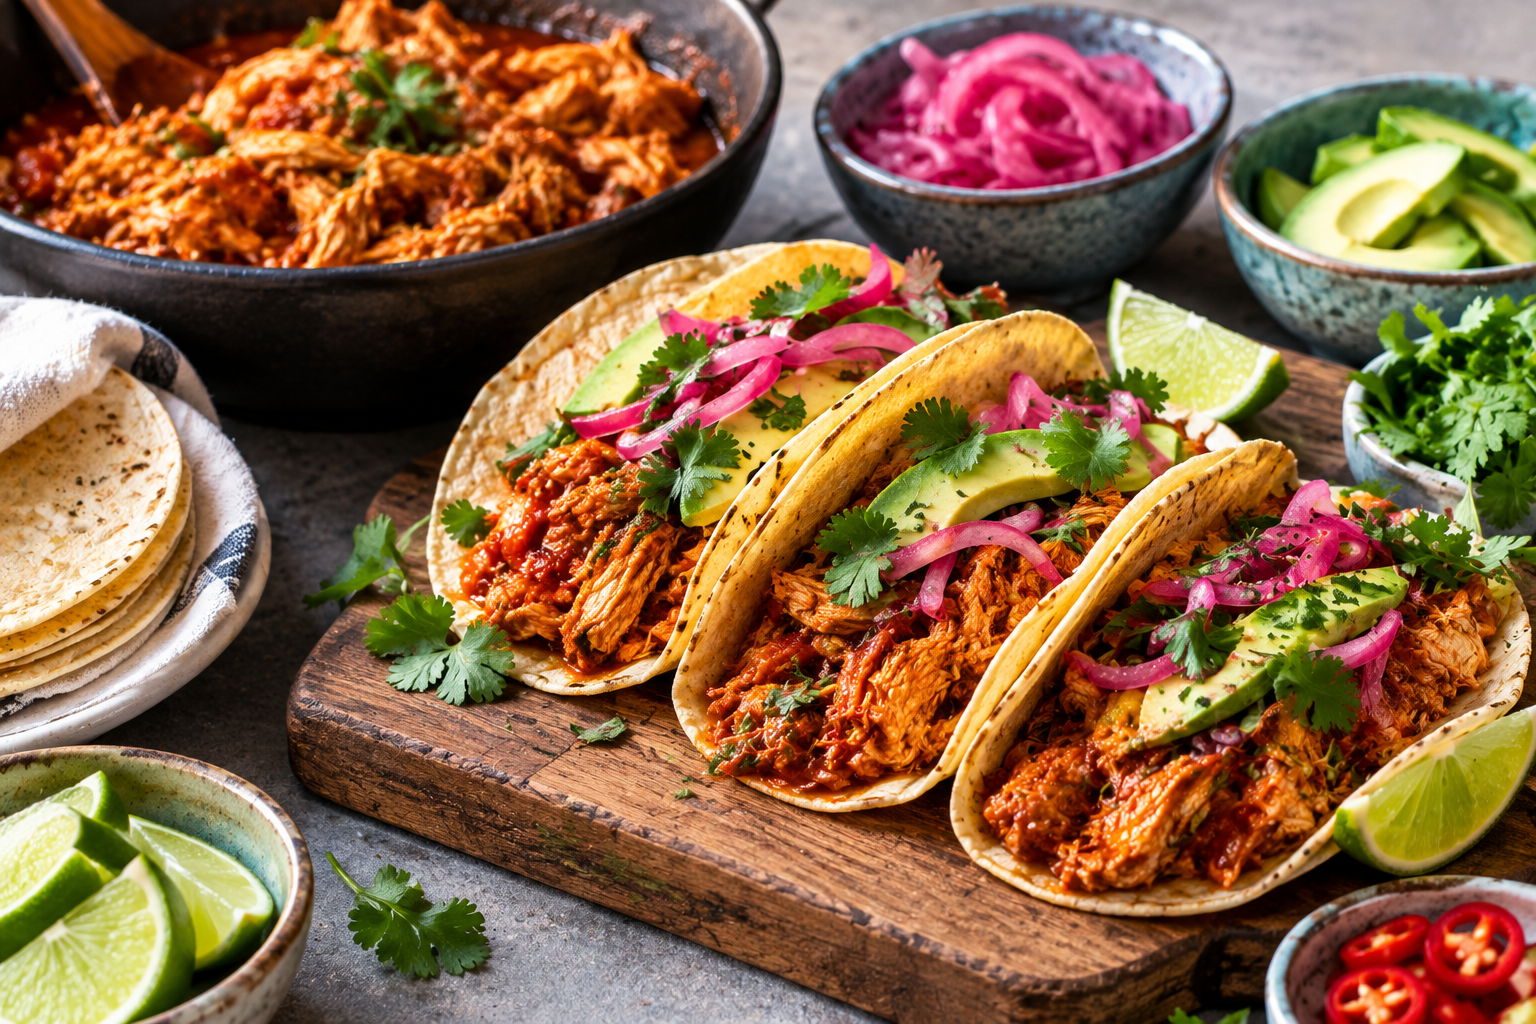
The chicken is really the only part that needs much cooking. Once it’s piled into warm tortillas with avocado, coriander, lime and some quick-pickled red onion, there’s enough freshness and acidity that the tacos don’t need much else.
This is my Mexican-inspired version rather than an attempt to define the traditional one.
Chicken Tinga Tacos are an easy combination of tender shredded chicken and a smoky tomato-chipotle sauce. This version uses chicken thigh for a juicy filling, then keeps the toppings fresh and simple with avocado, coriander, lime and quick-pickled red onion.
Servings 4
Course Main Course, Whole Meal
Cuisine Mexican inspired
Ingredients
Chicken Tinga
600gbonelessskinless chicken thigh
1tbspolive oil
1medium brown onionthinly sliced
3tspminced garlic
400gcanned tomatoes
1–2 chipotle chillies in adoboplus 1 tbsp adobo sauce
1tspdried oreganopreferably Mexican oregano if available
Alcohol is one of those ingredients I used to treat pretty simply. If a recipe said red wine, I’d use red wine. If a Chinese recipe called for cooking wine, I’d add cooking wine.
The more I’ve cooked, the more I’ve realised that the type of alcohol matters just as much as the amount.
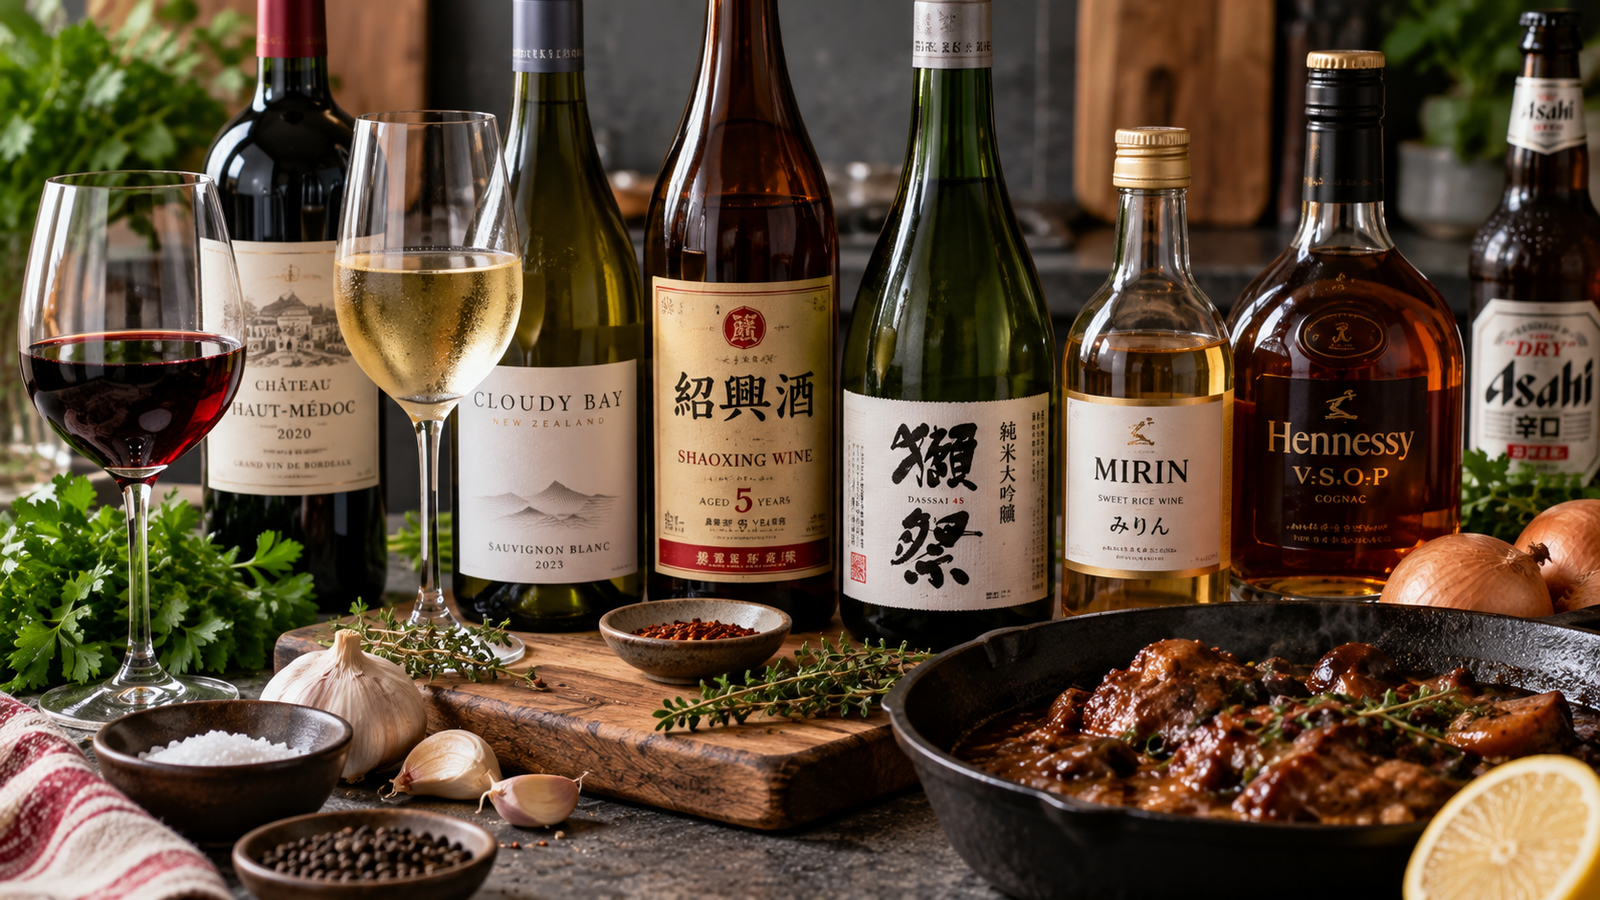
Red wine can give a beef stew depth and acidity. White wine can brighten seafood or a pan sauce. Shaoxing wine adds a flavour I immediately associate with Chinese cooking. Sake is much more delicate, while something stronger like brandy can completely change a sauce even when only a small amount is used.
And then there’s the advice that seems to appear everywhere:
“The alcohol just cooks off.”
It’s not quite that simple.
So this page isn’t about putting alcohol into everything I cook. It’s about understanding what it actually contributes, when I think it’s worth using, what I substitute when I don’t have it, and when I’d rather leave it out altogether.
What Does Alcohol Actually Do in Cooking?
When I add wine or another alcoholic ingredient, I’m usually looking for one or more of four things:
Flavour The drink itself brings flavour compounds from grapes, grains, fruits, herbs, oak ageing, fermentation or distillation.
Acidity and balance Wine in particular can cut through rich meat, butter, cream and rendered fat.
Aroma Alcohol can help carry aromatic compounds, which is part of the reason a splash of wine or spirits can noticeably change the smell and flavour of a dish.
Deglazing After browning meat or vegetables, liquid helps dissolve the browned material stuck to the bottom of the pan. Wine is particularly useful because it adds flavour and acidity at the same time.
I don’t add alcohol simply because a recipe traditionally contains it. I want to know what it’s doing there.
The Alcohols I Cook With
Type
General character
Where I use it
Dry white wine
Fresh, acidic, fruity
Seafood, chicken, pasta, pan sauces
Dry red wine
Richer, deeper, sometimes tannic
Beef, lamb, tomato sauces, braises
Shaoxing wine
Savoury, fermented, aromatic
Cantonese/Chinese stir-fries, marinades, braises
Sake
Clean, mild, slightly sweet
Japanese-inspired sauces, fish, chicken
Mirin
Sweet, mild, fermented
Glazes, teriyaki-style sauces, Japanese cooking
Sherry
Nutty to dry/sweet depending on type
Sauces, soups and some Chinese substitutions
Brandy/Cognac
Strong, fruity, warming
Cream sauces, meat, mushrooms
Marsala
Nutty, slightly sweet
Chicken, mushrooms, sauces
Beer
Malty, bitter to sweet
Batters, stews, braises
Rice wine
Varies considerably
Chinese and other Asian cooking
One important lesson here is that “cooking alcohol” is not one category.
I wouldn’t expect red wine and Shaoxing wine to do the same job just because both contain alcohol.
White Wine
Dry white wine is probably one of the easiest alcoholic ingredients to cook with.
I like it with seafood, chicken, mushrooms and pasta because it gives the dish acidity and aroma without adding the heavier flavour or colour of red wine.
It works particularly well after something has been browned in a pan.
I’ll remove or move the main ingredient, pour in some wine and scrape up everything stuck to the bottom. That browned material becomes part of the sauce rather than staying attached to the pan.
What I look for
For most savoury dishes, I generally want a dry white wine, not something noticeably sweet.
Sauvignon Blanc, Pinot Grigio/Gris and unoaked Chardonnay can all work depending on the dish.
I wouldn’t normally open an expensive bottle specifically for cooking.
But I also wouldn’t deliberately buy terrible wine just because it’s going into food.
If I wouldn’t want the flavour anywhere near my dinner, reducing it in a saucepan probably isn’t going to improve the situation.
Red Wine
Red wine behaves differently.
It’s generally something I reach for when the rest of the dish can stand up to it: beef, lamb, tomato, mushrooms, slow braises and richer sauces.
Reduction concentrates flavour, so the characteristics of the wine become more noticeable rather than magically disappearing.
That includes things I might not want.
A very tannic or heavily oaked wine can become quite aggressive when reduced too far.
For everyday cooking, I’d usually rather use a reasonably balanced dry red than something extremely powerful.
My Chorizo in Red Wine is a good example where the wine isn’t a background ingredient. It’s effectively part of the sauce.
Shaoxing Wine / 紹興酒
This is one of the alcohols where I don’t think “just use some wine” is particularly useful advice.
Shaoxing wine has a distinctive fermented, savoury aroma that I associate immediately with Chinese cooking.
It’s particularly common in marinades, stir-fries, braises and sauces.
In Cantonese-style cooking, even a relatively small amount can change the aroma of a dish substantially.
I might use it with:
Beef and oyster sauce Chicken Fish and seafood Mushrooms Braised meats Stir-fried vegetables Marinades
It works particularly well alongside ginger, spring onion, soy sauce and oyster sauce.
Shaoxing wine vs Shaoxing cooking wine
This is worth checking on the bottle.
Some products sold specifically as cooking wine contain added salt. That means I can’t necessarily treat them exactly like drinking-quality Shaoxing wine.
If I’m using salted cooking wine, I take that into account before adding soy sauce or additional salt.
Taste the dish before seasoning automatically.
Sake
Sake gives me a different result from Shaoxing wine.
It’s generally cleaner and more delicate, which suits Japanese-style cooking where I don’t necessarily want the alcohol ingredient dominating everything around it.
I’ll use sake with fish, chicken, mushrooms and soy-based sauces.
It’s one of those ingredients where substituting Shaoxing wine will technically give you fermented rice wine, but it can pull the flavour of the dish in a noticeably different direction.
They’re not interchangeable just because they’re both rice-based alcoholic drinks.
Mirin
Mirin is where things get slightly confusing because it’s often grouped with cooking wines even though I use it differently.
Mirin contributes sweetness, gloss and flavour.
That makes it particularly useful in Japanese-style glazes and sauces.
If a recipe contains mirin, I don’t automatically treat it as though the only purpose is alcohol.
Replacing it with dry sake, for example, removes a significant source of sweetness.
Likewise, adding sugar to sake can approximate part of what mirin contributes, but it isn’t literally the same ingredient.
Another thing worth checking is whether the bottle is genuine mirin or a mirin-style seasoning, because products can vary considerably.
Sherry
Sherry covers a surprisingly broad range of flavours, from very dry to distinctly sweet.
For cooking, dry sherry is particularly useful.
It’s also one of the more common emergency substitutions suggested for Shaoxing wine.
I think that’s reasonable when Shaoxing isn’t available, particularly with a dry style, but I still treat it as a substitution rather than pretending the flavours are identical.
For a recipe where Shaoxing is a major flavour, I’d rather use Shaoxing.
For a tablespoon going into a stir-fry on a Tuesday night, dry sherry can get the job done.
Brandy and Cognac
This is a completely different way of cooking with alcohol.
Because spirits contain much more alcohol than wine, I generally use much smaller amounts.
Brandy works particularly well with mushrooms, beef and creamy pan sauces.
It can add a deep fruity aroma without requiring a large volume of liquid.
I also don’t think flambéing is compulsory just because brandy is involved.
You can simply add it carefully and allow it to cook and reduce.
If you do flambé something, that’s a technique that deserves proper attention rather than something I’d recommend casually waving a lighter over.
Beer
Beer is another huge category rather than a single flavour.
A light lager, stout and aggressively hopped IPA will produce completely different results.
Beer can add maltiness, bitterness, sweetness and roasted flavours depending on the style.
I’d be cautious with highly bitter beers in reductions because reducing liquid also concentrates bitterness.
Does the Alcohol Really Cook Off?
Not instantly.
This is probably the biggest misconception around cooking with alcohol.
When wine hits a hot pan, some alcohol begins evaporating, but that doesn’t mean every trace disappears within seconds.
How much remains depends on things like:
How much alcohol was added
How long the dish cooks
Whether it’s simmered, baked or flambéed
The size and shape of the pan
Whether the alcohol is mixed throughout the food
Whether the dish is covered
A quick splash of wine into a sauce that’s cooked for another minute is different from a braise that simmers for several hours.
So I don’t describe a dish containing alcohol as automatically alcohol-free simply because it has been cooked.
That’s particularly worth remembering when cooking for someone who avoids alcohol completely.
When Should I Add Alcohol?
It depends on what I’m making.
For deglazing
Usually after browning the main ingredient and before adding the rest of the sauce.
Add the wine, scrape the pan and allow it to reduce.
For stir-fries
Shaoxing wine is often added in relatively small quantities during high-heat cooking.
I want its aroma incorporated without turning my stir-fry into something swimming in liquid.
For braises
Alcohol may be added earlier because it has plenty of time to integrate with the other ingredients.
For finishing
Some dishes intentionally add an alcoholic ingredient relatively late because retaining some of its aroma is the point.
There isn’t one universal rule that says alcohol must always be cooked for a certain number of minutes.
Reducing Wine
Reduction is one of the most useful things to understand.
If I add 250 ml of wine and then immediately add stock, cream and everything else, I’ve diluted the wine.
If I first simmer that wine down to perhaps half its volume, I’ve concentrated its flavour before building the rest of the sauce.
But more reduction isn’t automatically better.
Reducing also concentrates:
Acidity Sweetness Tannins Bitterness Salt, if the alcoholic ingredient contains it
So I reduce until the wine tastes integrated and concentrated, not simply until an arbitrary amount of liquid has disappeared.
Cooking Wine vs Drinking Wine
The phrase “only cook with wine you’d drink” gets repeated a lot.
I think it’s useful advice, but it’s also a bit dramatic.
I don’t need to enjoy drinking a glass of every wine I cook with.
What matters more is that the wine isn’t faulty and doesn’t have characteristics I actively dislike for the dish.
A $10 bottle can make a perfectly good sauce.
A $100 bottle is mostly wasted in one.
And something sold as cooking wine can sometimes contain salt or other ingredients that change how it should be used.
Read the label rather than relying entirely on the words on the front.
What Can I Substitute?
This depends on what the alcohol is doing.
If it’s mostly providing acidity, I might use:
Stock + a little vinegar Stock + lemon juice
If it’s providing liquid and savoury depth:
Chicken, beef or vegetable stock can often work.
If it’s providing sweetness, as with mirin:
A small amount of sugar or honey alongside another liquid may get closer.
If it’s providing a distinctive fermented flavour, as with Shaoxing:
Dry sherry is often a more useful substitute than simply using stock.
But I don’t believe every alcoholic ingredient needs a perfect alcohol-free imitation.
Sometimes I’d rather make a slightly different but good sauce than create a complicated substitute trying to reproduce something it can’t.
My Starting Substitution Guide
If the recipe calls for
I’d consider
Dry white wine
Stock + small squeeze lemon or splash white wine vinegar
Red wine
Beef/vegetable stock + small amount red wine vinegar
Shaoxing wine
Dry sherry
Sake
Dry sherry in some dishes, or stock for alcohol-free cooking
Mirin
Sake + sweetness, or water/stock + sweetness for alcohol-free
Brandy
Often simply omit or use stock, depending on the sauce
Beer
Stock, although the resulting flavour will be different
These aren’t exact replacements.
They’re starting points.
Alcohol and Salt
This is something I pay particular attention to with Asian cooking wines.
Plain wine usually doesn’t contribute much salt.
Salted cooking wine can.
If I’m making a sauce containing Shaoxing cooking wine, soy sauce and oyster sauce, I’ve potentially got three salty ingredients before I’ve touched the salt shaker.
That’s why I generally build the sauce first and adjust the final seasoning afterwards.
Alcohol and Sweetness
Alcoholic ingredients can also contain very different amounts of sugar.
Dry white wine isn’t equivalent to sweet white wine.
Dry sherry isn’t equivalent to cream sherry.
Sake isn’t equivalent to mirin.
A sweet wine reduced in a saucepan can become considerably sweeter.
So when I’m substituting one alcohol for another, sweetness is one of the first things I consider.
What I Keep at Home
I don’t think a home kitchen needs a bar full of alcohol specifically for cooking.
For the way I cook, a useful small collection would be:
Shaoxing wine for Chinese cooking.
Dry white wine when I’m making seafood, chicken, pasta or pan sauces.
Dry red wine for richer meat dishes and braises.
Sake and mirin when I’m cooking Japanese-style dishes often enough to justify keeping them.
Everything beyond that depends on what I’m actually cooking.
And if I already have an appropriate bottle open for drinking, I’m obviously more likely to use that than open another one just to put 100 ml into dinner.
My Quick Guide
If I’m cooking seafood or a light pan sauce: Dry white wine
If I’m cooking beef, lamb or a rich braise: Dry red wine
If I’m cooking Cantonese or Chinese: Shaoxing wine
If I’m cooking Japanese and want something clean and savoury: Sake
If I need sweetness and glaze in Japanese cooking: Mirin
If I need a Shaoxing substitute: Dry sherry
If I’m making a rich mushroom or cream sauce: Brandy can be excellent
If I’m making a stew or batter: Consider beer
The Main Thing I’ve Learned
Alcohol isn’t one ingredient.
Even calling something “wine” doesn’t tell me enough.
What matters is whether I’m trying to add acidity, sweetness, fermented flavour, aroma, bitterness, richness or simply enough liquid to lift everything stuck to the bottom of a pan.
Once I understand why the alcohol is there, it becomes much easier to decide which bottle to use, how much to add, whether I should reduce it, and whether I need it at all.
I don’t want to use something simply because a recipe tells me to.
From everyday button mushrooms to shiitake, wood ear and snow fungus
I used to think of mushrooms mostly as different versions of the same ingredient. Button mushrooms, Swiss browns, shiitake, whatever was available.
The more I’ve cooked with them, especially across Chinese, Vietnamese and Western dishes, the more I’ve realised how differently they behave.
Some mushrooms are great for browning in a hot pan. Some are better at soaking up sauces and adding umami to a dish. Others, particularly some of the fungi used in Chinese cooking, are there as much for their texture as their flavour.
Growing up with Chinese and Vietnamese food also meant ingredients like dried shiitake and wood ear never seemed particularly unusual to me. But they’re used very differently from the button mushrooms, Swiss browns and portobellos I’d later cook with in Western dishes.
So this isn’t meant to be a guide to every edible fungus in the world. It’s a collection of the ones I actually cook with, what I think they’re good at, and how I use them.
Mushrooms Aren’t All Interchangeable
You can substitute one mushroom for another in plenty of recipes, but the result isn’t necessarily going to be the same.
A button mushroom cooked in butter becomes soft and juicy. A king oyster mushroom can stay dense and almost meaty. Dried shiitake can flavour an entire braise. Wood ear might contribute very little flavour but give a stir-fry a completely different texture.
That’s why I find it more useful to choose mushrooms based on what I want them to do in the dish, rather than simply treating “mushrooms” as one ingredient.
Mushroom / Fungus
Flavour
Texture
I like it for
Button
Mild
Soft and juicy
Breakfasts, pasta, sauces
Swiss brown / Cremini
Earthier and more savoury
Firm
Pasta, pan-frying, sauces
Portobello
Rich and earthy
Dense and meaty
Grilling, roasting
Shiitake
Strong savoury/umami
Firm, slightly chewy
Stir-fries, soups, braises
Dried shiitake
Very savoury and aromatic
Dense and chewy
Chinese braises, soups, stocks
Oyster
Mild and savoury
Tender
Stir-fries, high-heat cooking
King oyster
Mild
Dense and meaty
Searing, grilling, stir-fries
Enoki
Very mild
Fine and slightly crisp
Hotpot and soups
Shimeji
Savoury, slightly nutty
Firm
Stir-fries, soups, mixed mushroom dishes
Wood ear
Very mild
Crunchy and springy
Chinese stir-fries, soups
Snow fungus
Almost neutral
Delicate, slightly gelatinous
Chinese soups and desserts
The Ones I Use
Button Mushrooms
Probably the most straightforward mushroom and the one I think of when a Western recipe simply says “mushrooms.”
They’re mild enough to take on butter, garlic, herbs, cream, wine and other stronger flavours without dominating the dish.
I use them when I want mushrooms to be part of a dish rather than the flavour of the dish.
Good for: breakfast, pasta, creamy sauces, pizza, soups and simple pan-fried mushrooms.
Swiss Brown / Cremini
These are one of my favourite easy upgrades from button mushrooms.
They’re still versatile, but I find them a little deeper and more savoury. They also hold their shape nicely when browned.
If I’m making a mushroom pasta or something where the mushrooms are more important to the finished dish, I’ll generally choose these over buttons.
Good for: pasta, risotto, pan sauces, steak sides and mixed mushroom dishes.
Portobello
Portobellos are essentially the big, mature end of the common mushroom family, but in cooking they behave almost like their own ingredient.
Their size and firmer texture means you can grill or roast them without them disappearing into the dish.
I particularly like them when I want the mushroom itself to be one of the main components rather than chopped into a sauce.
Good for: grilling, roasting, burgers, stuffing and substantial vegetable dishes.
Asian Mushrooms
Shiitake
Shiitake is where mushroom flavour starts becoming much more obvious.
It has a strong savoury character and considerably more personality than a button mushroom. I use it frequently in Chinese-style cooking where that stronger mushroom flavour works with soy sauce, oyster sauce, ginger and garlic.
Fresh shiitake and dried shiitake are also different enough that I don’t really think of them as identical ingredients.
Good for: stir-fries, noodles, soups, steamed dishes and braises.
Dried Shiitake / 冬菇
This deserves its own section.
Drying shiitake concentrates and changes its aroma. Once rehydrated, dried shiitake has a much stronger flavour than fresh shiitake and a denser, chewier texture.
It’s one of those pantry ingredients where the soaking liquid can be almost as useful as the mushroom itself.
I usually soak dried shiitake until completely softened, squeeze out the excess water, remove the tough stem and then slice or use them whole depending on the dish.
Don’t automatically throw away the soaking liquid.
Once strained to remove grit, it can be added to braises, soups, sauces or rice for extra mushroom flavour.
That’s particularly useful when I want more savoury depth without simply adding more soy or oyster sauce.
Oyster Mushrooms
Oyster mushrooms are much more delicate.
Rather than cutting them neatly, I generally like tearing them into natural pieces. The irregular edges brown particularly well.
They can become quite soft if slowly cooked in liquid, so when I’m using them in a stir-fry I prefer a hot pan and relatively short cooking time.
They’re also great with garlic, lemongrass and chilli.
Good for: stir-fries, high-heat pan frying, noodles and vegetarian dishes.
King Oyster Mushrooms
Despite the name, king oyster mushrooms cook very differently from ordinary oyster mushrooms.
The thick stem is the interesting part.
It’s dense, firm and almost meaty, which means it can be sliced, scored, seared or grilled rather than simply tossed through a dish.
They also don’t have an overpowering mushroom flavour, so they’re particularly good at taking on marinades and sauces.
Good for: searing, grilling, stir-fries, skewers and dishes where you want substantial mushroom texture.
Enoki
Enoki is much more about texture than strong mushroom flavour.
The long thin stems soften quickly while retaining a little bite, so I don’t cook them for very long.
They’re one of those ingredients I associate immediately with hotpot. Drop them into the broth towards the end and they really don’t need much else.
Good for: hotpot, soups, noodle dishes and quick stir-fries.
Shimeji
Shimeji sits somewhere between delicate mushrooms and firmer varieties for me.
It holds together well, has a pleasant savoury flavour and works particularly well when mixed with other mushrooms.
One important difference from some other mushrooms is that shimeji should be cooked rather than eaten raw, as cooking removes its unpleasant raw bitterness.
Good for: stir-fries, soups, pasta and mixed mushroom dishes.
Then There Are the Fungi
Some ingredients I’ve always associated with the general mushroom category in cooking don’t behave much like conventional mushrooms at all.
That’s one reason I’ve called this page Mushrooms & Fungi.
Wood Ear / 木耳
Wood ear is a perfect example.
I don’t use it because I want something to taste strongly of mushrooms. Its flavour is very mild.
I use it for the texture.
Once properly rehydrated, it’s springy, slightly crunchy and provides a completely different bite from the meat and vegetables around it.
That’s particularly useful in Chinese stir-fries where several contrasting textures can be part of the same dish.
Dried wood ear expands a lot, so you generally need much less than you think.
Good for: stir-fries, soups, dumpling fillings and cold Chinese dishes.
Snow Fungus / 雪耳
Snow fungus is another ingredient that’s more about texture than mushroom flavour.
Once soaked it expands into delicate translucent clusters. Depending on how long it’s cooked, it can retain some bite or become much softer and almost gelatinous.
Unlike most of the mushrooms on this page, it’s also commonly used in Chinese sweet soups and desserts.
Good for: Chinese soups, slow-cooked dishes and traditional sweet soups.
Fresh vs Dried Mushrooms
This is particularly important in Chinese cooking.
Dried mushrooms aren’t necessarily an inferior substitute for fresh ones. Sometimes the dried version is the ingredient you actually want.
Fresh shiitake gives you a relatively clean mushroom flavour and tender texture.
Dried shiitake gives you a stronger aroma, chewier texture and flavoured soaking liquid.
So if a Chinese braise specifically calls for dried shiitake, replacing it with fresh shiitake will still give you mushrooms, but it won’t produce exactly the same dish.
How I Brown Mushrooms
One of the biggest improvements I made to cooking mushrooms was simply learning to stop moving them around constantly.
Mushrooms contain a lot of water. Put too many into a small pan and they’ll release moisture faster than it can evaporate. Instead of browning, they effectively steam.
For mushrooms I actually want browned:
Get the pan properly hot.
Don’t overcrowd it.
Add enough oil or fat to lightly coat the pan.
Add the mushrooms.
Leave them alone.
Let one side develop colour before tossing or turning.
Add easily burnt ingredients such as minced garlic later.
If I’m cooking a large quantity, I’d rather use two batches than pile everything into one pan.
This doesn’t apply equally to every fungus. I’m not trying to develop a golden crust on snow fungus or wood ear.
Again, it comes back to asking what I want that particular ingredient to do.
Mushrooms and Oil
Mushrooms can seem to make oil disappear.
Their structure allows them to absorb liquid and fat, particularly early in cooking. It’s tempting to keep pouring more oil into the pan every time it looks dry.
I try not to.
As the mushrooms cook and release their own water, things usually start moving around the pan more easily.
If I’m trying to keep a dish relatively light, I’ll add oil gradually rather than automatically giving the mushrooms everything they’ll absorb.
When I Salt Mushrooms
You’ve probably heard that salting mushrooms too early makes them release water and prevents browning.
There’s some truth behind the observation that salt encourages moisture to come out, but I don’t treat “never salt mushrooms early” as an absolute rule.
If I want maximum browning, I’ll usually get some colour onto them first and season afterwards.
If they’re going into a sauce, soup or braise where browning isn’t particularly important, I’m much less concerned about when the salt goes in.
For me, pan temperature and overcrowding make a bigger practical difference than obsessing over the exact second the salt touches the mushrooms.
Cleaning Mushrooms
I don’t think mushrooms need to be treated as though a drop of water will ruin them.
If they’re relatively clean, I’ll brush or wipe away visible dirt.
If they’re genuinely dirty, I’ll rinse them quickly and dry them rather than eating dirt for the sake of culinary tradition.
What I don’t do is leave fresh mushrooms sitting in water unnecessarily.
For dried mushrooms and fungi, soaking is obviously a completely different story because rehydrating them is part of preparing the ingredient.
What I’d Substitute
There isn’t a perfect mushroom substitution chart because it depends on what the mushroom is doing in the recipe.
But as a starting point:
Button ↔ Swiss brown Usually an easy substitution.
Swiss brown ↔ Portobello Similar flavour family, although you’ll need to account for the much larger size.
Fresh shiitake ↔ oyster/shimeji Possible in many stir-fries, but the flavour and texture will change.
Oyster ↔ king oyster They’re related, but I don’t consider them direct substitutes because the textures are so different.
Fresh shiitake ↔ dried shiitake Possible sometimes, but definitely not equivalent. Dried shiitake is substantially more intense.
Wood ear ↔ conventional mushrooms Not really. If wood ear is there for crunch, replacing it with button mushrooms misses the point.
Snow fungus ↔ conventional mushrooms Again, not really interchangeable.
Building a Mixed Mushroom Dish
If I’m using several varieties together, I don’t necessarily want three mushrooms that all do the same thing.
I’d rather combine different characteristics.
For example:
Swiss brown + shiitake + oyster
gives me a familiar browned mushroom, a stronger umami mushroom and something more delicate.
Or:
Shiitake + king oyster + wood ear
gives me strong mushroom flavour, dense meaty texture and crunch.
That’s much more interesting to me than simply adding more varieties for the sake of saying a dish contains five mushrooms.
Mushrooms in Different Cuisines
One of the things I like most about mushrooms is seeing how differently they’re treated around the world.
In a Western-style dish I might cook Swiss browns in butter with garlic and thyme.
In a Cantonese dish I might use dried shiitake with oyster sauce, ginger and Shaoxing wine.
For Vietnamese cooking I might stir-fry oyster mushrooms with lemongrass and fish sauce.
In Japanese-inspired cooking I might pair shimeji and shiitake with miso, soy or butter.
The ingredient might broadly be a mushroom, but the reason I’ve chosen that particular mushroom can be completely different.
That’s really the point of this page.
Don’t just choose a mushroom. Choose what you want the mushroom to do.
My Quick Guide
If I want mild and versatile: button.
If I want a stronger everyday mushroom: Swiss brown.
If I want large and meaty: portobello.
If I want strong umami: shiitake.
If I want deep Chinese mushroom flavour: dried shiitake.
If I want delicate pieces that brown well: oyster.
If I want a dense, meaty bite: king oyster.
If I want something for hotpot: enoki.
If I want small, firm mushrooms: shimeji.
If I want crunch: wood ear.
If I want delicate texture in Chinese soups or desserts: snow fungus.