Author: Gary

  • Chicken & Egg Pasta alla Famiglia

    Chicken & Egg Pasta alla Famiglia

    Inspired by the silky technique behind carbonara, this pasta uses egg, Parmesan and pasta water to create a creamy sauce without adding cream. Chicken turns it into a more substantial everyday meal, while garlic and plenty of black pepper keep the flavours simple and familiar.

    The key is taking the pan off the heat before adding the egg mixture, giving you a smooth, glossy sauce rather than scrambled eggs.

    Ingredients

    • 350 g spaghetti
    • 500 g chicken breast, sliced into bite-sized pieces
    • 1 tbsp olive oil
    • 3 garlic cloves, finely minced
    • 3 large eggs
    • 70 g Parmesan, finely grated
    • 1/2 tsp salt
    • 1/2 tsp black pepper
    • 150 ml reserved pasta water
    • 2 tbsp chopped parsley, optional

    Equipment

    • Large pot
    • Large frying pan
    • Mixing Bowl
    • Tongs

    Method

    1. Whisk the eggs and Parmesan together in a bowl until combined. Season generously with black pepper.
    2. Cook the spaghetti in salted boiling water until al dente. Reserve 150 ml pasta water before draining.
    3. Meanwhile, heat the olive oil in a large frying pan over medium-high heat. Season the chicken with salt and pepper and cook for 5–7 minutes until golden and cooked through.
    4. Add the garlic and cook for 30 seconds.
    5. Add the drained spaghetti to the chicken and toss together. Remove the pan completely from the heat.
    6. Wait about 30 seconds, then add the egg and Parmesan mixture while tossing continuously. Gradually add reserved pasta water until a smooth, silky coating forms.
    7. Removing the pan from direct heat is important. Too much heat will scramble the eggs rather than creating a sauce.
    8. Continue tossing until glossy, adding another splash of pasta water if the sauce becomes too thick.
    9. Finish with parsley, black pepper and additional Parmesan.

    Tried this recipe?

    Let us know how it was!

  • Chicken, Tomato & Mozzarella Pasta Bake

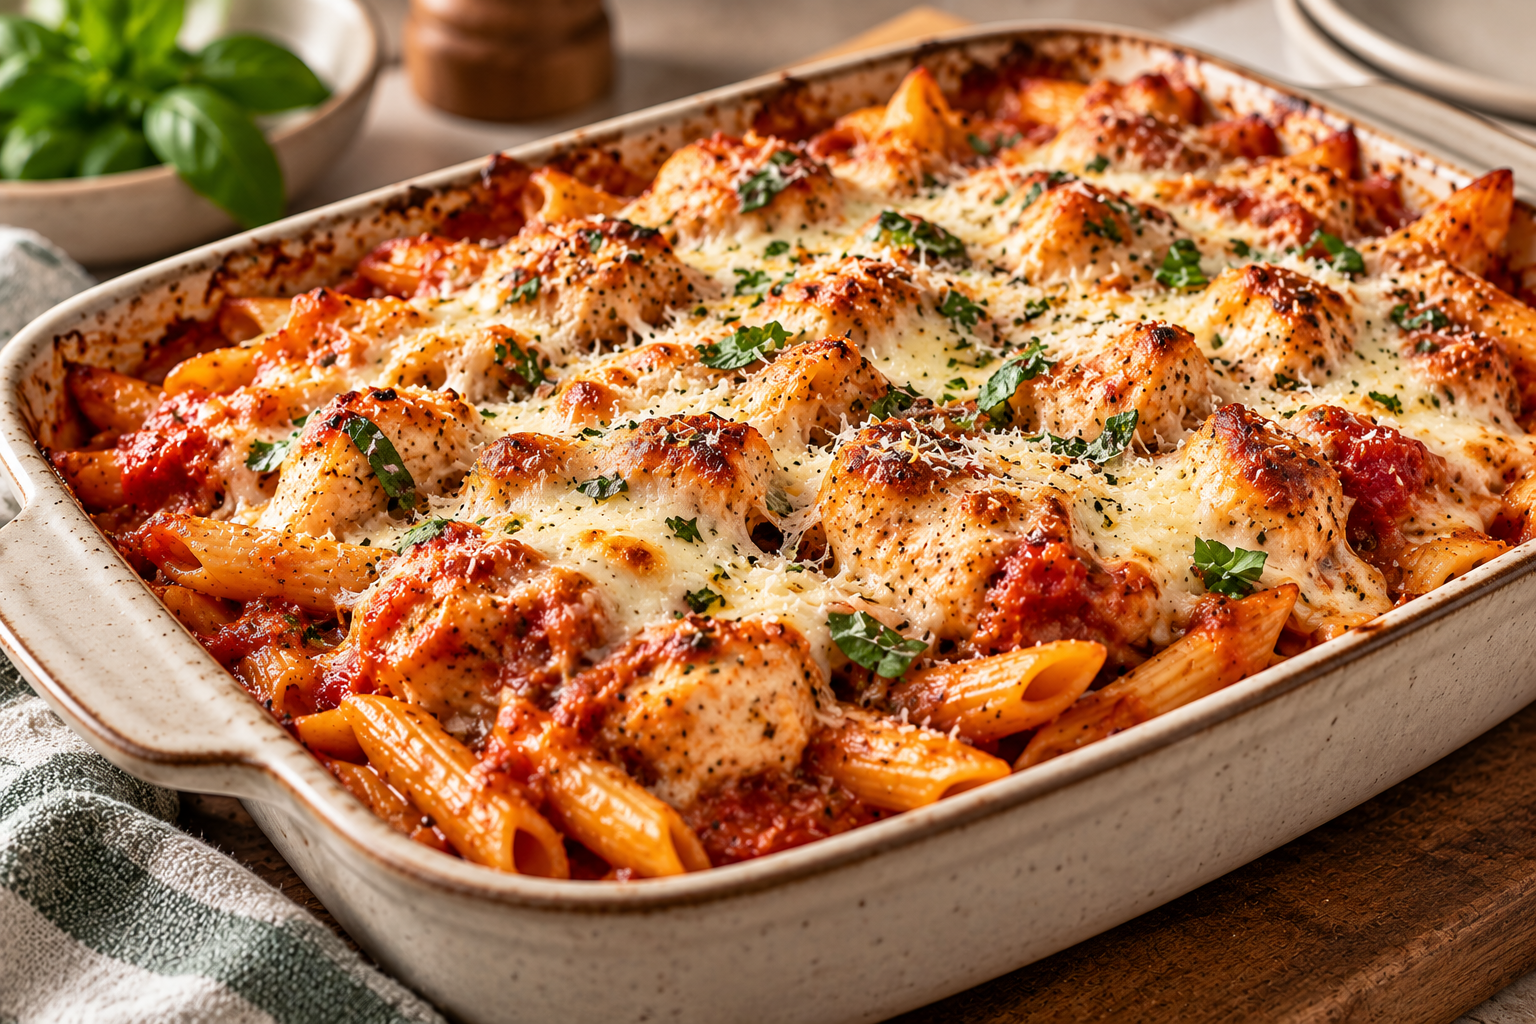
    Chicken, Tomato & Mozzarella Pasta Bake

    A comforting pasta bake loaded with tender chicken, tomato sauce and plenty of melted mozzarella. Everything comes together in one bubbling, cheesy bake with golden edges and plenty of sauce throughout.

    It’s an easy one to make in a bigger batch, making it just as useful for weeknight dinner as it is portioned out for lunches during the week.

    Ingredients

    Ingredients
    • 400 g short pasta such as penne or rigatoni
    • 600 g chicken breast, cut into bite-sized pieces
    • 1 tbsp olive oil
    • 1 brown onion, finely diced
    • 3 garlic cloves, minced
    • 700 ml tomato passata
    • 1 tbsp tomato paste
    • 1 tsp Italian herbs
    • 1 tsp sugar
    • 1/2 tsp salt
    • 1/2 tsp black pepper
    • 200 g mozzarella, grated
    • 50 g Parmesan, finely grated

    Equipment

    • Large pot
    • Large frying pan
    • Large baking dish
    • Colander

    Method

    Instructions
    1. Preheat the oven to 200°C.
    2. Cook the pasta in salted boiling water for 2 minutes less than the packet directions, then drain.
    3. Tip: Undercooking the pasta slightly prevents it becoming too soft during baking.
    4. Heat the olive oil in a large frying pan over medium-high heat. Add the chicken and cook until lightly golden. Remove and set aside.
    5. Reduce to medium heat. Add the onion and cook for 3–4 minutes until softened. Add the garlic and cook for another 30 seconds.
    6. Add the passata, tomato paste, Italian herbs, sugar, salt and black pepper. Simmer for 5 minutes.
    7. Return the chicken to the sauce and simmer for another 2–3 minutes.
    8. Combine the pasta with the chicken and tomato sauce, then transfer to a baking dish.
    9. Scatter mozzarella and Parmesan evenly over the top.
    10. Bake for 15–20 minutes until bubbling and golden.
    11. Tip: For extra browning, finish under the grill for 1–2 minutes while watching closely.
    12. Rest for 5 minutes before serving or dividing into meal-prep containers.

    Tried this recipe?

    Let us know how it was!

  • Garlic Parmesan Chicken Pasta

    Garlic Parmesan Chicken Pasta

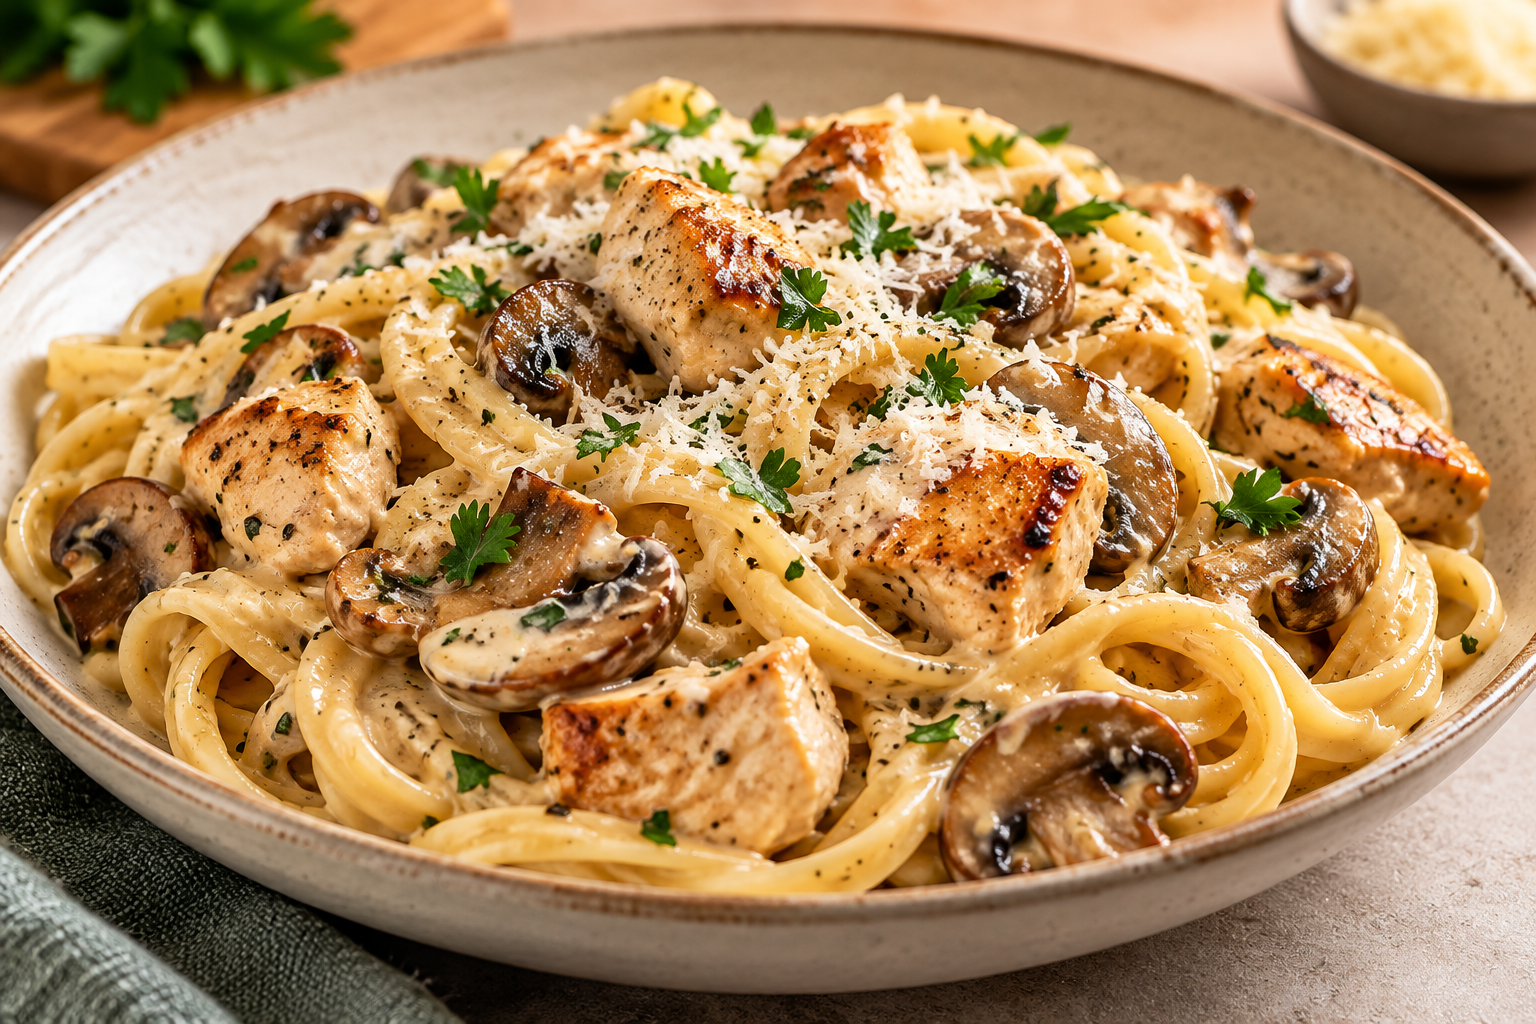
    Creamy, garlicky and packed with chicken and mushrooms, this is the kind of pasta that works when you want something comforting without making dinner complicated. The mushrooms add plenty of savoury flavour while Parmesan brings everything together into a rich, creamy sauce.

    It’s simple enough for a weeknight dinner and makes a good option for meal prep when you want something you’ll actually look forward to reheating.

    Ingredients

    • 350 g 350 g pasta
    • 500 g 500 g chicken breast, cut into bite-sized pieces
    • 1 tbsp 1 tbsp olive oil
    • 4 4 garlic cloves, finely minced
    • 2 tbsp 2 tbsp butter
    • 60 g 60 g finely grated Parmesan
    • 1 tsp 1 tsp Italian herbs
    • 1/2 tsp 1/2 tsp salt
    • 1/2 tsp 1/2 tsp black pepper
    • 150 ml 150 ml reserved pasta water
    • 2 tbsp 2 tbsp chopped parsley, optional optional

    Equipment

    • Large pot
    • Large frying pan
    • Colander
    • Tongs or wooden spoon

    Method

    1. Bring a large pot of salted water to the boil and cook the pasta until just al dente. Reserve 150 ml pasta water before draining.
    2. Keep the pasta slightly firm because it will finish cooking in the pan.
    3. Season the chicken with salt, black pepper and Italian herbs.
    4. Heat the olive oil in a large frying pan over medium-high heat. Add the chicken and cook for 5–7 minutes until golden and cooked through. Remove and set aside.
    5. Reduce the heat to medium. Add the butter and garlic and cook for about 30 seconds until fragrant.
    6. Don’t brown the garlic or it can become bitter.
    7. Add the drained pasta and 100 ml reserved pasta water. Toss vigorously until the butter and pasta water begin to emulsify.
    8. Reduce the heat to low. Add the Parmesan gradually while tossing, adding more pasta water as required until the pasta has a glossy coating.
    9. Adding Parmesan over lower heat helps prevent it clumping.
    10. Return the chicken to the pan and toss until everything is heated through and evenly coated.
    11. Finish with parsley and additional Parmesan if desired.

    Tried this recipe?

    Let us know how it was!

  • Honey Soy Garlic Pork Chops

    Honey Soy Garlic Pork Chops

    Honey Soy Garlic Pork Chops

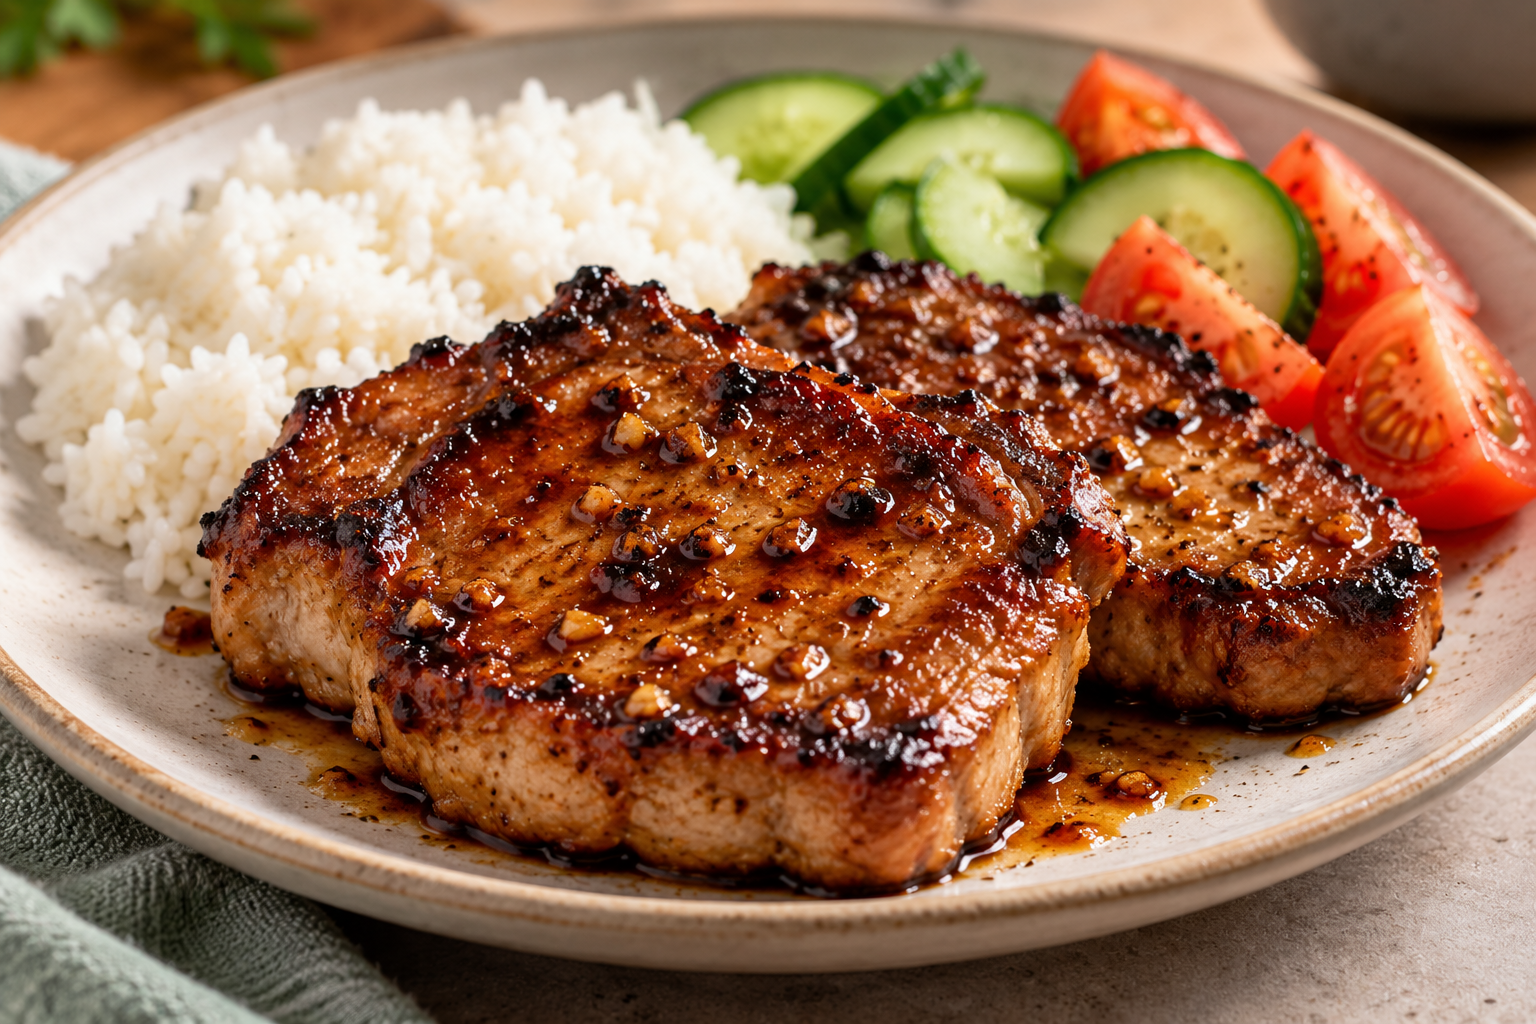
    Sweet, savoury and garlicky with a caramelised finish, these pork chops are an easy option when you want plenty of flavour without much effort. The honey soy marinade works especially well with pork, helping the outside brown beautifully while keeping the chops juicy.

    Serve them with steamed rice and something fresh on the side to balance the richness.

    Honey Soy Garlic Pork Chops

    Prep 10 minutes
    Cook 18 minutes
    Marinating Time 4 hours
    Juicy pork chops marinated in a savoury-sweet combination of soy sauce, honey, garlic and Shaoxing wine, then air-fried until caramelised on the outside and tender inside.
    Servings 6

    Ingredients

    Marinade
    • 1.2 kg pork chops
    • 3 tbsp light soy sauce
    • 2 tbsp honey
    • 1 tbsp oyster sauce
    • 1 tbsp Shaoxing wine
    • 1 tbsp neutral oil
    • 1 tsp sesame oil
    • 4 cloves garlic, finely minced
    • 1 tsp freshly ground black pepper
    • ½ tsp Chinese five-spice powder, optional

    Equipment

    • Large bowl or container
    • Air Fryer
    • Tongs
    • Meat thermometer

    Method

    1. Combine the light soy sauce, honey, oyster sauce, Shaoxing wine, neutral oil, sesame oil, garlic, black pepper and five-spice powder in a large bowl.
    2. Add the pork chops and turn until thoroughly coated in the marinade. Cover and refrigerate for 4–8 hours.
    3. For thick pork chops, several hours of marinating gives the seasoning time to flavour the surface of the meat. Turn the chops once or twice if they are not completely surrounded by the marinade.
    4. Remove the pork chops from the refrigerator about 15–20 minutes before cooking. Allow excess marinade to drip off, leaving a thin coating on the meat.
    5. Removing excess marinade helps the pork caramelise rather than steam. The honey and soy can also burn if a large amount of marinade is left clinging to the chops.
    6. Preheat the air fryer to 180°C. Arrange the pork chops in a single layer with space between each piece.
    7. Cook in batches if necessary. Crowding the basket reduces airflow and makes browning less effective.
    8. Air fry at 180°C for 8 minutes. Flip the pork chops and continue cooking for another 6–8 minutes, depending on their thickness.
    9. Check the internal temperature at the thickest part of the chop, avoiding the bone. Once nearly cooked, increase the air fryer to 210–220°C and cook for another 1–3 minutes to caramelise the exterior.
    10. Honey darkens quickly at high temperatures, so use the high-temperature stage only as a short finish and watch the pork closely.
    11. Cook the pork chops to an internal temperature of at least 63°C, then remove from the air fryer and rest for at least 3 minutes before serving.
    12. Check the temperature in the thickest part of the meat without touching the bone. Resting allows the juices to redistribute while completing the safe cooking process.
    13. Serve the pork chops whole or slice and serve with steamed rice, cucumber, tomato and pickled vegetables.

    Tried this recipe?

    Let us know how it was!

  • Chilli Beef & Spring Onion Knife-Cut Noodles

    Chilli Beef & Spring Onion Knife-Cut Noodles

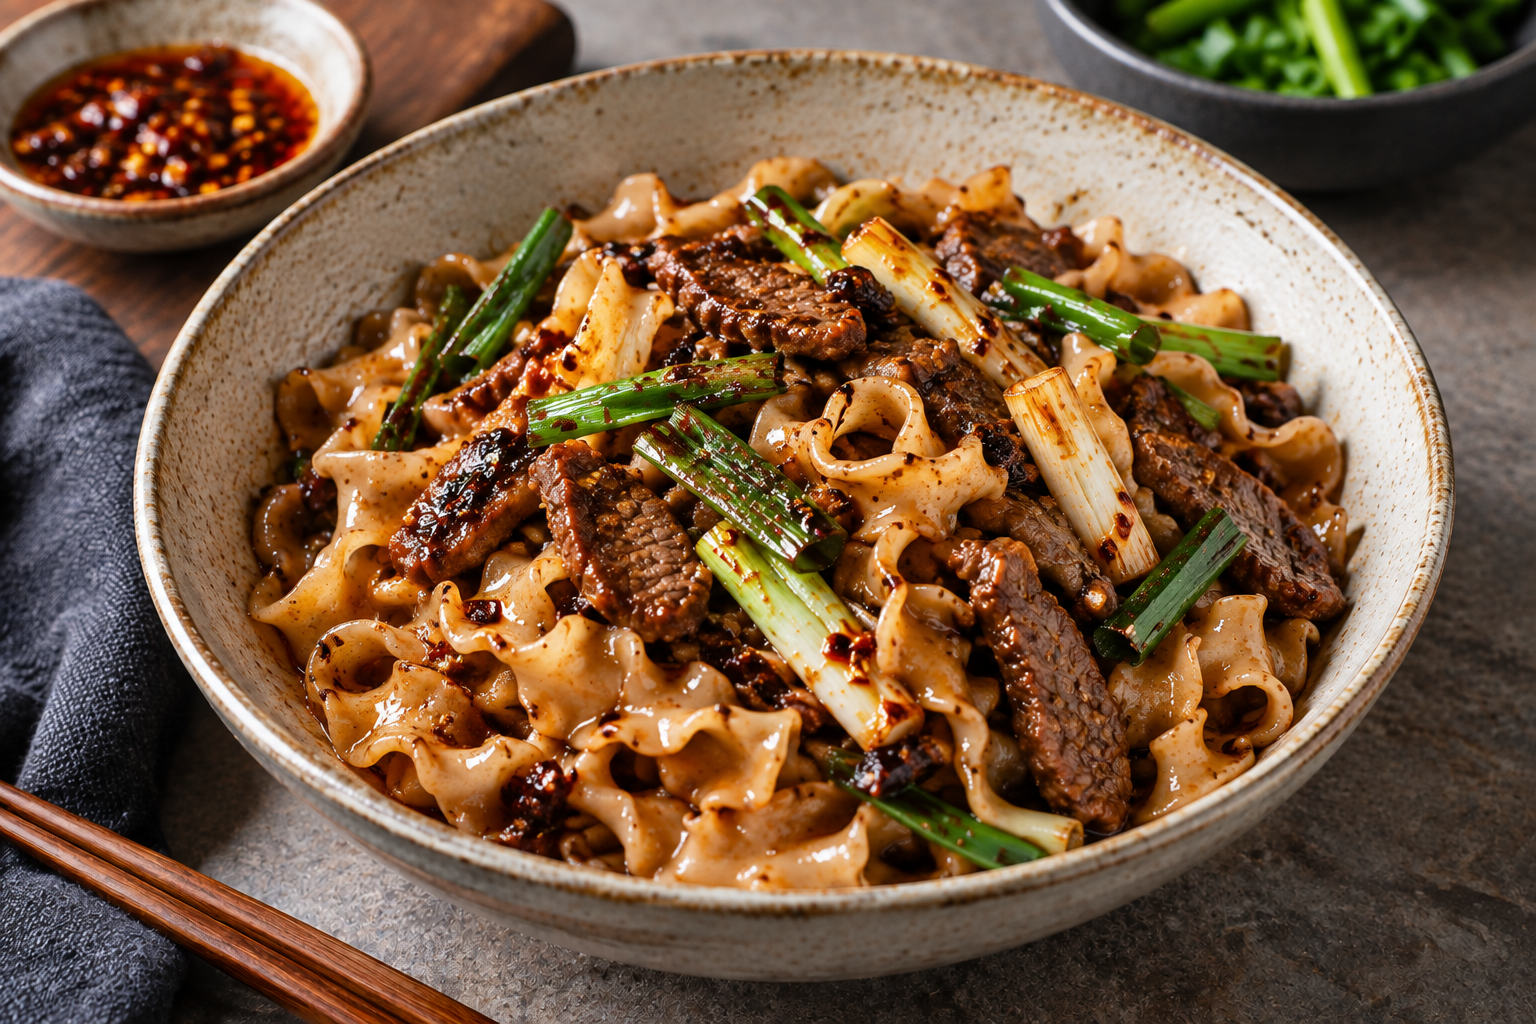
    This is the kind of noodle dish I like when I want something beefy and satisfying without a heavy sauce. Thinly sliced topside gets a quick Chinese-style marinade before being stir-fried with big batons of spring onion.

    The noodles are cooked separately, chilled and tossed with chilli oil, black vinegar and soy rather than being fried in the wok. The hot beef and charred spring onion go straight over the cold, chewy noodles, giving you that contrast between savoury beef, sharp vinegar, chilli oil and cool noodles.

    Chilli Beef & Spring Onion Knife-Cut Noodles

    Prep 25 minutes
    Cook 15 minutes
    Chewy buckwheat knife-cut noodles tossed in a chilli, black vinegar and soy dressing, topped with tender stir-fried beef and charred spring onion.
    Servings 2
    Course Main Course
    Cuisine Chinese Inspired

    Ingredients

    Beef
    • 300 g beef topside thinly sliced across the grain
    • 1 tbsp light soy sauce
    • 1 tbsp Shaoxing wine
    • 1 tsp oyster sauce
    • 1 tsp cornflour
    • ½ tsp bicarbonate of soda
    • ¼ tsp white pepper
    • 1 tsp neutral oil
    Noodles
    • 180 g dry buckwheat knife-cut noodles
    • 4 –5 spring onions
    • 1 –2 tsp neutral oil for stir-frying
    Chilli Vinegar Dressing
    • 2 tbsp light soy sauce
    • 1½ tbsp Chinese black vinegar
    • 1½ tbsp chilli oil including some chilli sediment
    • 1 tsp sesame oil
    • 1 tsp honey
    • 1 small garlic clove finely grated, optional
    • 1 –2 tbsp noodle cooking water as needed

    Equipment

    • Large pot
    • Wok or large frying pan
    • Mixing Bowl
    • Colander
    • Tongs

    Method

    Slice and marinate the beef
    1. Slice the topside thinly across the grain. If you’re having trouble getting thin slices, putting the beef in the freezer for 20–30 minutes first will firm it up.
    2. Combine the beef with the soy sauce, Shaoxing wine, oyster sauce, cornflour, bicarbonate of soda and white pepper.
    3. Mix thoroughly until the marinade coats the beef and starts to disappear into it.
    4. Add the teaspoon of neutral oil and mix again.
    5. Leave to marinate for 20–30 minutes.
    Prepare the spring onion
    1. Cut the spring onions into roughly 5 cm batons.
    2. Keep the thicker white and pale-green sections separate from the softer dark-green sections. The thicker pieces can take more heat and benefit from getting a little char.
    Make the dressing
    1. Combine the light soy sauce, black vinegar, chilli oil, sesame oil, honey and optional garlic in a large mixing bowl.
    2. Taste it before adding the noodles.
    3. It should taste slightly stronger, sharper and saltier than you ultimately want, because the noodles and beef will dilute the dressing.
    4. Cook and chill the noodles
    5. Cook the knife-cut noodles according to the packet directions until cooked but still chewy.
    6. Before draining, reserve about ¼ cup of the cooking water.
    7. Drain the noodles and rinse thoroughly under cold running water until completely cool. This stops the cooking and washes away excess surface starch.
    Drain very well.
    1. Add the chilled noodles to the dressing and toss thoroughly. If the dressing isn’t distributing easily, add 1 tablespoon of reserved noodle water.
    2. Set aside while you cook the beef.
    Stir-fry the beef
    1. Heat a wok or large frying pan over high heat until very hot.
    2. Add about 1 teaspoon neutral oil.
    3. Spread the beef out rather than immediately stirring it. Let it sear briefly, then toss and continue stir-frying until browned and almost cooked through.
    4. With a smaller pan, cook the beef in two batches rather than overcrowding it.
    5. Remove the beef and set aside.
    6. Char the spring onion
    7. Return the wok to high heat.
    8. Add another small splash of oil if the wok is dry, followed by the white and pale-green spring onion batons.
    9. Stir-fry for about 45–60 seconds, allowing them to blister and char in places while retaining some texture.
    10. Add the darker green sections and cook for another 20–30 seconds.
    11. Return the beef to the wok and toss everything together just long enough to finish cooking the beef.
    Assemble
    1. Give the chilled dressed noodles another toss and divide between two bowls.
    2. Pile the hot beef and charred spring onion over the noodles, including any juices left in the wok.
    3. You can leave it layered for serving or toss everything together immediately before eating.
    4. Taste and finish with a little extra black vinegar or chilli oil if needed.

    Tried this recipe?

    Let us know how it was!
  • White Wine Garlic Mussel Spaghetti

    White Wine Garlic Mussel Spaghetti

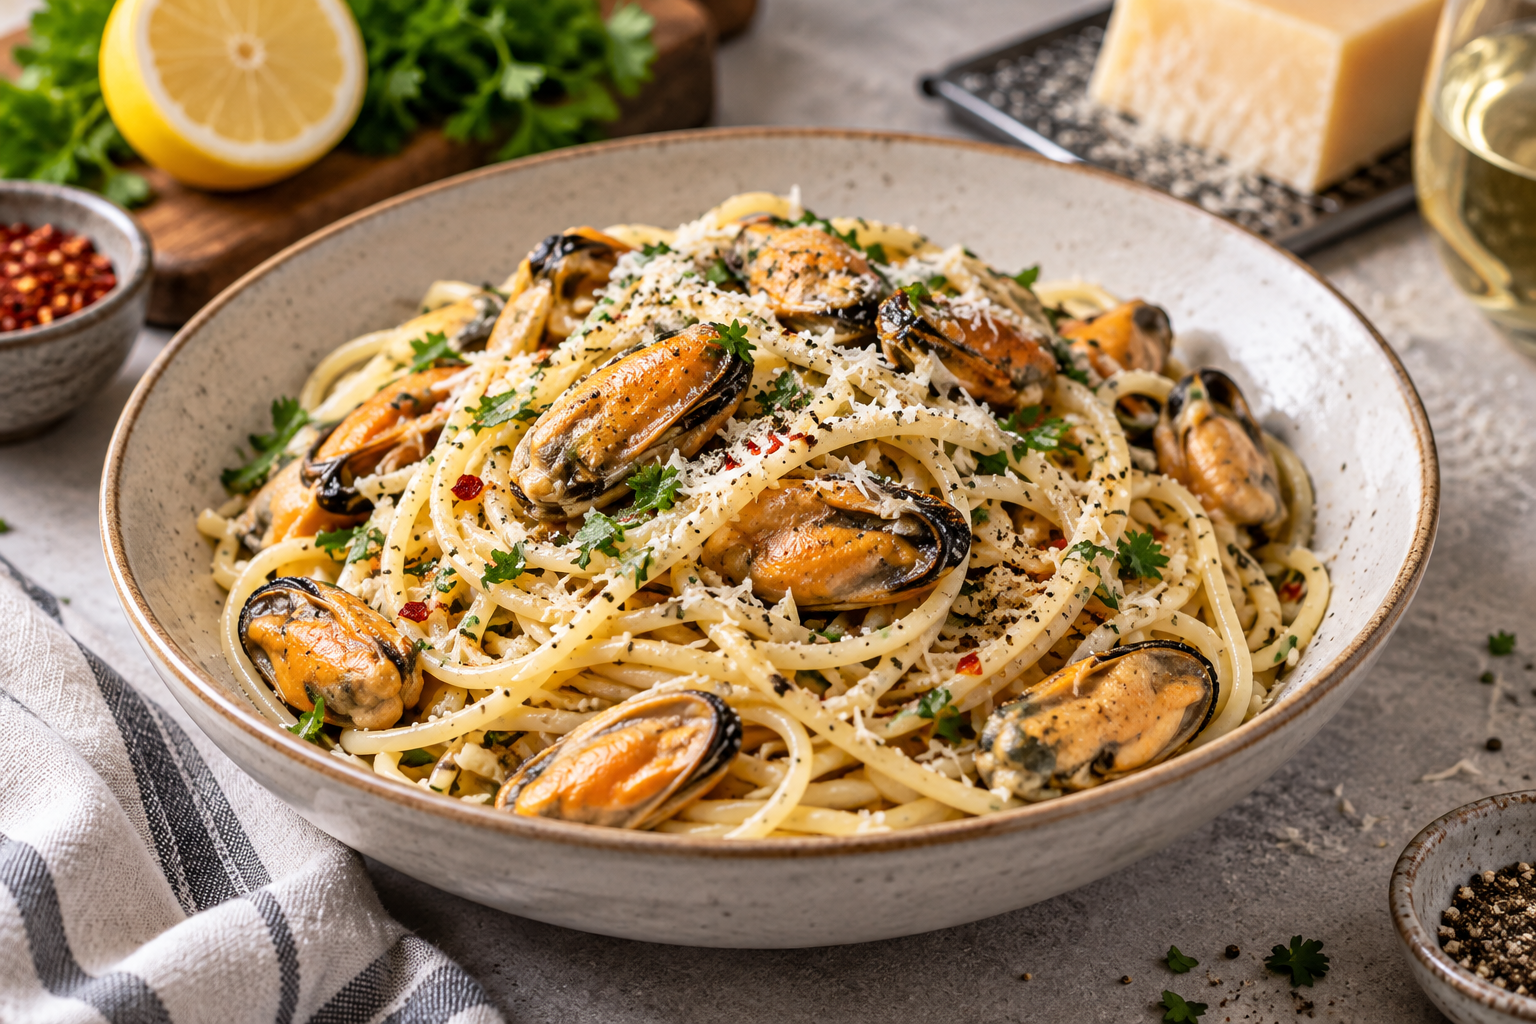
    Frozen mussel meat is one of those ingredients I like keeping in the freezer because there’s almost no preparation involved, and it can turn into a proper pasta pretty quickly.

    This started as my White Wine Garlic Mussels, but I’ve ended up preferring it as a spaghetti dish. The mussels still get added right at the end so they don’t become rubbery, while the white wine, garlic, butter and pasta water form a light sauce that coats the spaghetti.

    A little Pecorino goes in at the end. It’s not enough to turn this into a cheesy pasta, but it adds saltiness and richness and helps bring the sauce together.

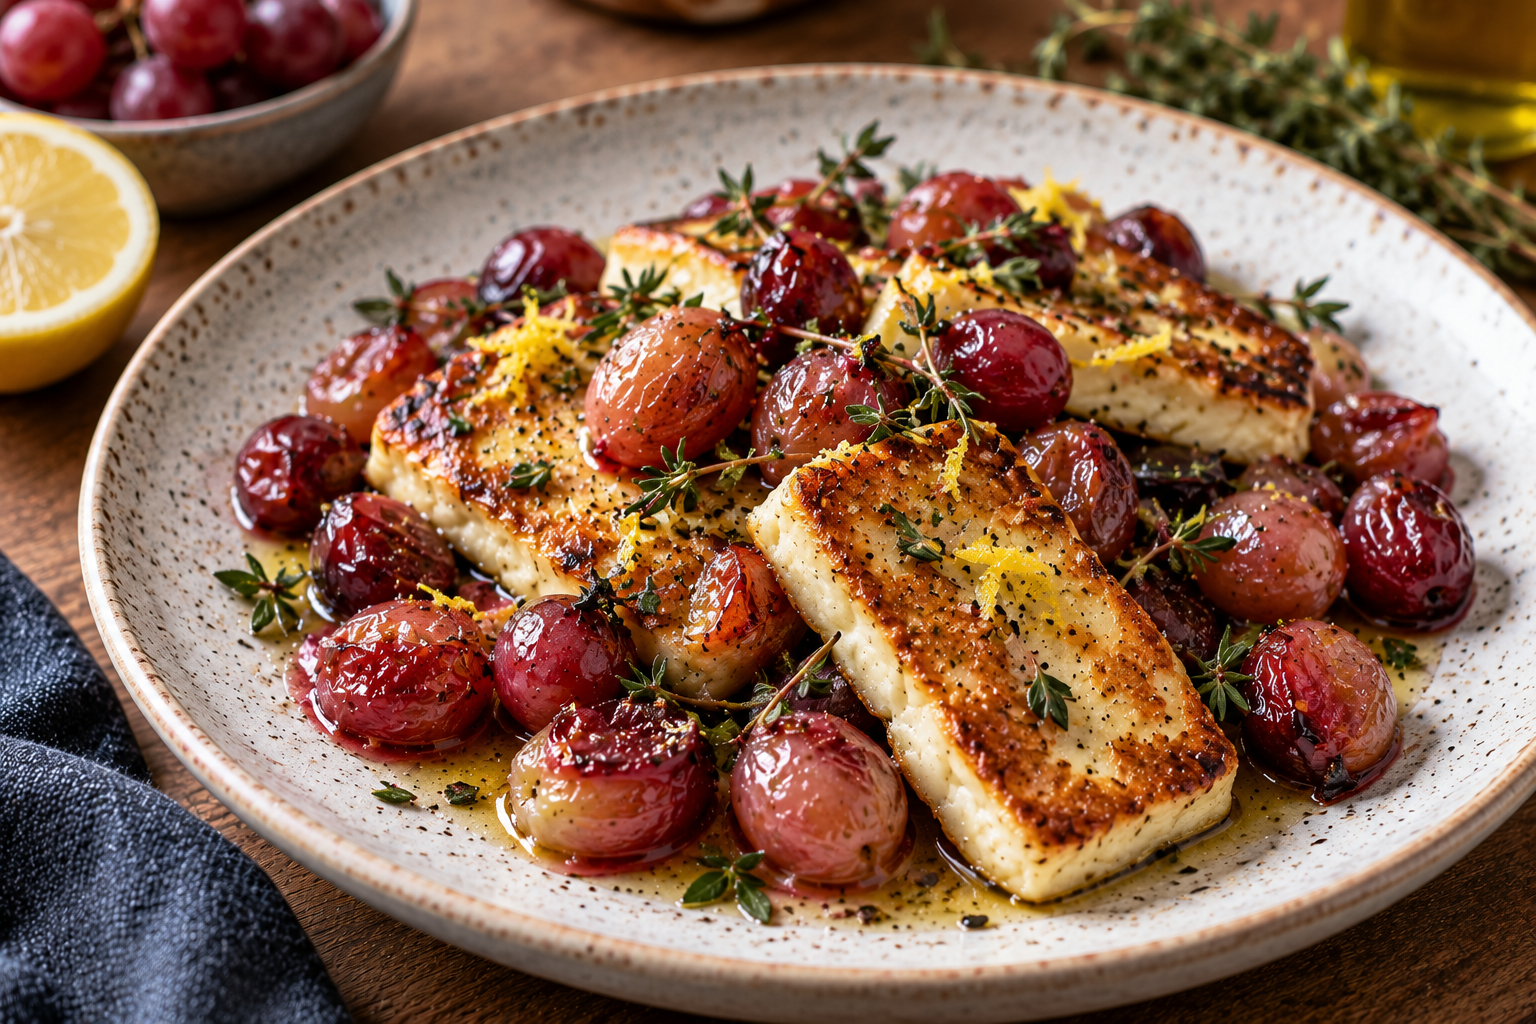
  • Halloumi with Roasted Grapes, Lemon & Thyme

    Halloumi with Roasted Grapes, Lemon & Thyme

    Halloumi usually gets paired with lemon, salad or something sweet like honey, but I wanted to try something where the sweetness came from the ingredient itself rather than adding another dressing.

    Roasted grapes work surprisingly well for that.

    Once they’re exposed to high heat, they soften, blister and become noticeably sweeter, while some burst and release their juice into the pan. Against salty, deeply browned halloumi, that little bit of sweetness makes much more sense than I expected.

    I’ve kept everything else fairly simple. There’s thyme for an earthy flavour, lemon to bring back some acidity and black pepper to cut through the richness.

    The important part is cooking the grapes and halloumi separately. The grapes need enough time to collapse and concentrate, while halloumi is at its best when it’s browned quickly and served immediately.

    Put them together at the end and you get a small plate that’s salty, sweet, sharp and savoury without needing much else.

    Halloumi with Roasted Grapes, Lemon & Thyme

    Prep 10 minutes
    Cook 20 minutes
    Golden pan-fried halloumi served with blistered roasted grapes, fresh thyme and lemon. The grapes become naturally sweet and juicy in the oven, providing a contrast to the salty cheese without needing honey or added sugar.
    Servings 4

    Ingredients

    • Roasted Grapes
    • 250 g seedless red grapes
    • 1 tbsp extra virgin olive oil
    • 4 sprigs fresh thyme
    • ¼ tsp freshly cracked black pepper
    • Small pinch of salt
    • Halloumi
    • 250 g halloumi
    • 1 tsp extra virgin olive oil
    • To Finish
    • 1 tbsp fresh lemon juice
    • 1 tsp finely grated lemon zest
    • 1 tsp fresh thyme leaves
    • Freshly cracked black pepper
    • 1 tsp extra virgin olive oil optional

    Equipment

    • Baking tray
    • Baking paper
    • Large frying pan
    • Mixing Bowl
    • Serving plate

    Method

    1. Preheat the oven
    2. Preheat the oven to 220°C conventional / 200°C fan.
    3. Line a baking tray with baking paper.
    4. Prepare the grapes
    5. Remove the grapes from their stems and place them in a bowl.
    6. Add:
    7. 1 tbsp olive oil
    8. 4 thyme sprigs
    9. Black pepper
    10. Small pinch of salt
    11. Toss until lightly coated.
    12. Roast the grapes
    13. Spread the grapes over the prepared tray in a single layer.
    14. Roast for 15–20 minutes.
    15. You’re looking for grapes that have softened and blistered, with some beginning to collapse or split.
    16. There should also be a small amount of concentrated grape juice collecting on the tray.
    17. Don’t discard it.
    18. Prepare the halloumi
    19. While the grapes are finishing, drain the halloumi and pat it thoroughly dry.
    20. Cut into approximately 8–10 mm thick slices.
    21. I’d rather have reasonably thick pieces than thin slices. Halloumi needs enough thickness to remain soft inside after the outside has browned.
    22. Heat the pan
    23. Heat a large frying pan over medium-high heat.
    24. Add 1 tsp olive oil and spread it very lightly across the pan.
    25. Halloumi doesn’t need much additional fat.
    26. Brown the halloumi
    27. Add the halloumi in a single layer.
    28. Cook without moving for approximately 1½–2 minutes.
    29. Once deeply golden underneath, turn and cook the second side for another 1–2 minutes.
    30. Remove from the heat as soon as both sides are browned.
    31. Don’t continue cooking it while waiting for everything else.
    32. Add lemon to the grapes
    33. Remove the roasted grapes from the oven.
    34. Discard the woody thyme stems.
    35. Add 1 tbsp lemon juice and gently toss the grapes through their roasting juices.
    36. The lemon should balance the concentrated sweetness rather than make the grapes taste sharply acidic.
    37. Assemble
    38. Arrange the hot halloumi over a serving plate.
    39. Spoon the roasted grapes around and partially over the cheese.
    40. Make sure to spoon over the juices remaining on the baking tray as well.
    41. Finish
    42. Scatter over:
    43. Lemon zest
    44. Fresh thyme leaves
    45. Freshly cracked black pepper
    46. Finish with a very small drizzle of extra virgin olive oil if you think it needs it.
    47. Serve immediately while the halloumi is still hot.

    Tried this recipe?

    Let us know how it was!
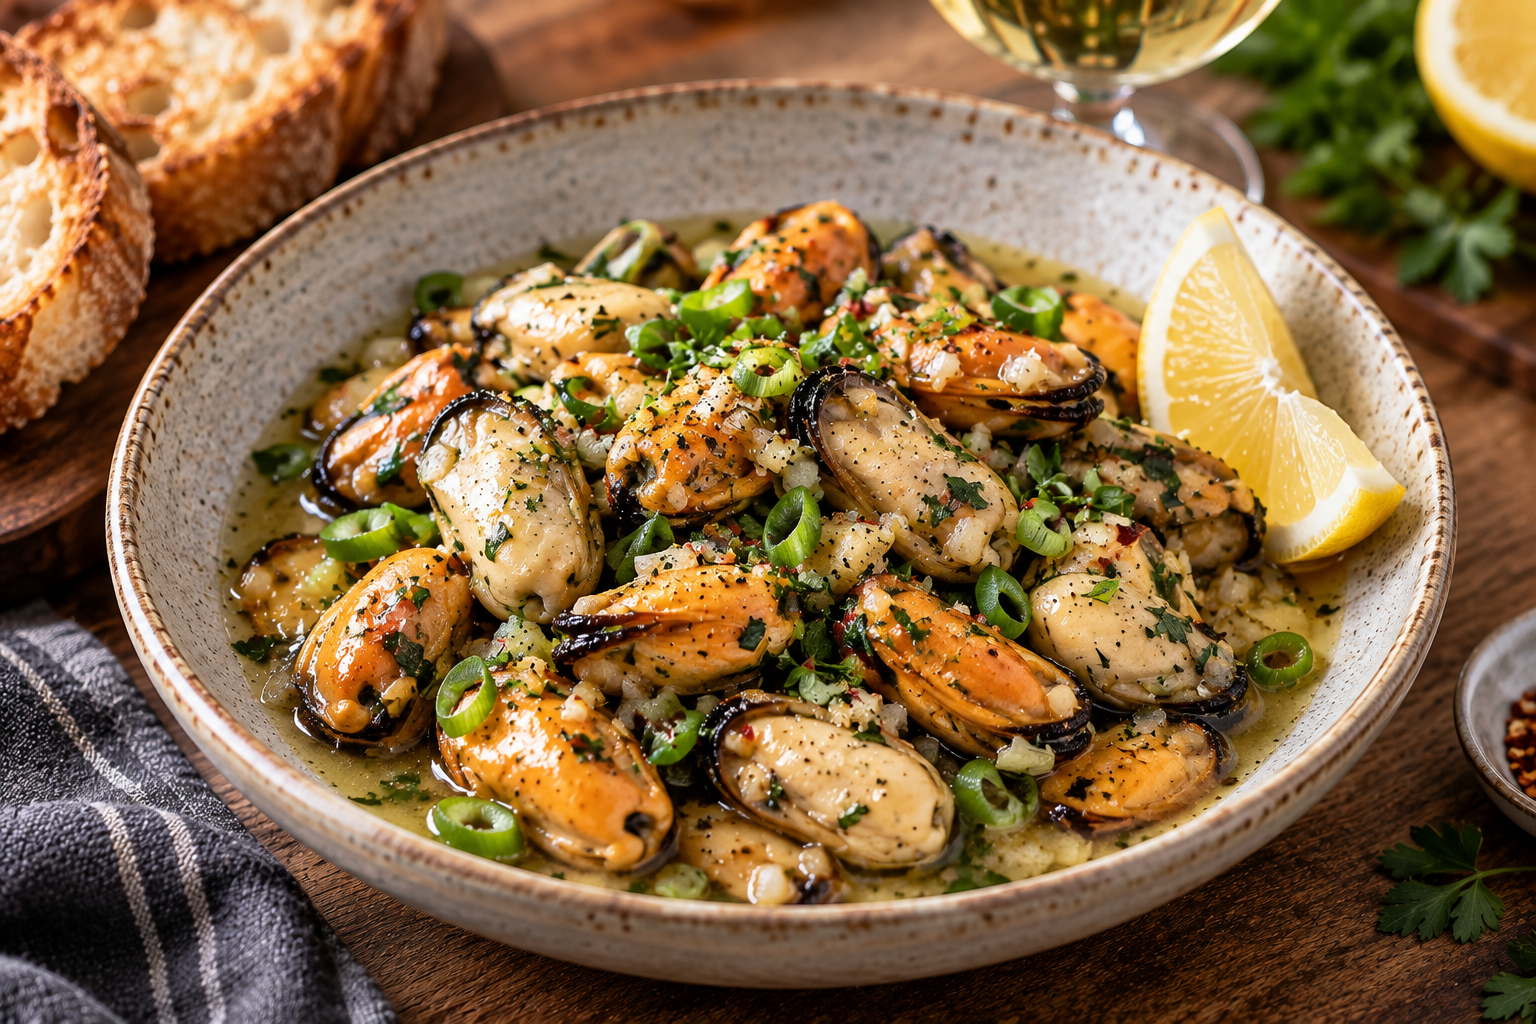
  • White Wine Garlic Mussels

    White Wine Garlic Mussels

    Frozen mussel meat is one of those ingredients I like having around because there’s almost no preparation involved, but it’s very easy to overcook.

    For this recipe, most of the actual cooking happens before the mussels even enter the pan.

    I start with shallot, garlic and a little butter, then add a generous amount of dry white wine and let it reduce. Only once the wine has concentrated do the mussels go in, and they stay there just long enough to heat through.

    The final piece of butter goes in off the heat, turning the reduced wine and mussel juices into a light, glossy sauce.

    There’s no cream and not much else competing with the mussels. Just garlic, wine, butter, a little chilli if I feel like it, lemon and something fresh at the end.

    And for this one, I’d consider the crusty bread part of the meal rather than an optional extra. There’s going to be sauce left in the bowl, and that’s probably the best bit.

    White Wine Garlic Mussels

    Prep 1 hour 10 minutes
    Cook 15 minutes
    This recipe is designed specifically for frozen mussel meat rather than shell-on mussels. The white wine is reduced before the mussels are added, giving the sauce plenty of flavour without requiring cream. Because frozen mussel meat is commonly already cooked, the mussels only go into the pan at the end so they stay tender rather than becoming chewy.
    Course Main Course
    Cuisine European inspired

    Ingredients

    Mussels
    • 500 g frozen mussel meat thawed
    • 1 tbsp extra virgin olive oil
    • 10 g unsalted butter
    • 1 small shallot finely diced
    • 3 tsp minced garlic
    • ½ tsp chilli flakes optional
    • ½ tsp freshly cracked black pepper
    White Wine Butter Sauce
    • 150 ml dry white wine
    • 15 g cold unsalted butter
    • 2 tsp –2 tsp fresh lemon juice
    • Salt only if needed
    To Finish
    • 2 spring onions green parts finely sliced
    • Extra black pepper
    • Lemon wedges
    To Serve
    • Crusty sourdough or other good bread
    • Extra virgin olive oil optional

    Method

    Thaw the mussels
    1. Thaw the mussels overnight in the refrigerator.
    2. Ideally, place them in a sieve or colander set over a bowl so they’re not sitting in all the liquid released as they defrost.
    3. Once completely thawed, drain well.
    4. Pat them reasonably dry with paper towel.
    5. Keep refrigerated until you’re ready to cook.
    6. Check whether they’re already cooked
    7. Check the packaging.
    8. Most frozen mussel meat is already cooked, in which case you’re essentially reheating it in the finished sauce.
    9. If yours is raw, it needs to be cooked completely according to the packet directions.
    10. The cooking times below assume pre-cooked frozen mussel meat.
    Start the aromatics
    1. Heat a large frying pan over medium heat.
    2. Add the olive oil and 10 g butter.
    3. Once the butter begins foaming, add the finely diced shallot.
    4. Cook for approximately 2–3 minutes, until softened but not heavily browned.
    5. Add garlic
    6. Add the garlic and optional chilli flakes.
    7. Cook for about 30 seconds, stirring continuously.
    8. You want the garlic fragrant but not browned.
    9. Add the white wine
    10. Pour in the 150 ml white wine.
    11. Increase the heat to medium-high and bring to a strong simmer.
    12. Scrape the bottom of the pan to release anything that has started sticking.
    13. Let the wine reduce by approximately half, which should take around 3–5 minutes.
    14. This step is important.
    15. If you add the mussels immediately after adding the wine, they’ll be sitting in the pan while you’re waiting for 150 ml of alcohol and water to reduce. That’s exactly how already-cooked mussels become rubbery.
    16. Add the mussels
    17. Once the wine has reduced, add the drained mussel meat.
    18. Add the black pepper.
    19. Toss gently through the sauce.
    20. For pre-cooked mussels, cook for approximately 2–3 minutes, just until they’re thoroughly heated.
    21. Don’t keep simmering them once they’re hot.
    22. Finish with cold butter
    23. Turn off the heat.
    24. Add the remaining 15 g cold butter.
    25. Gently toss or swirl the pan as the butter melts into the reduced wine and mussel juices.
    26. The sauce should become slightly glossy while remaining quite light.
    27. This isn’t supposed to become a thick butter sauce.
    28. Add lemon
    29. Start with 1 teaspoon lemon juice.
    30. Taste.
    31. Add the second teaspoon if you think it needs more acidity.
    32. Don’t automatically add salt. Mussels can contribute considerable salinity themselves, so taste the finished sauce first.
    33. Add spring onion
    34. Add most of the finely sliced green spring onion and toss briefly.
    35. Transfer everything to a shallow serving bowl.
    36. Finish with the remaining spring onion and another crack of black pepper.
    37. Serve immediately with lemon wedges and plenty of crusty bread.

    Tried this recipe?

    Let us know how it was!
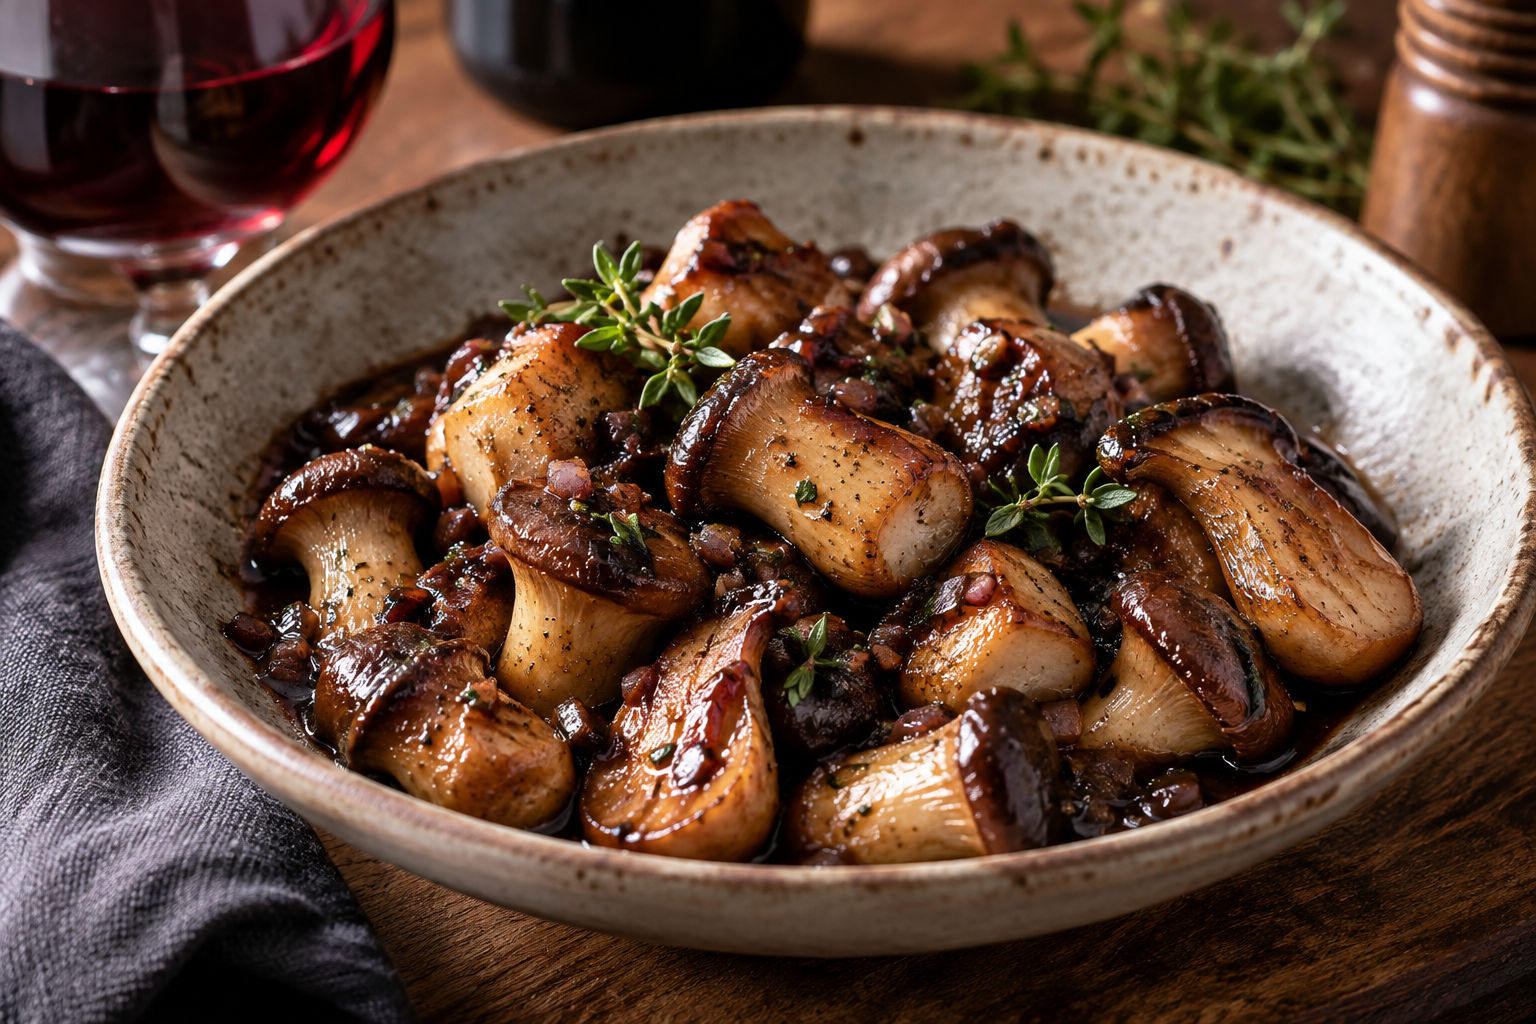
  • Red Wine Glazed Mini King Oyster Mushrooms

    Red Wine Glazed Mini King Oyster Mushrooms

    I originally thought about turning these mushrooms into a red wine sauce, but once I realised I only had 50 ml of wine left, I actually liked the idea of using it as a glaze instead.

    Mini king oyster mushrooms are particularly good for this because there’s no need to slice them into thin pieces. The smaller ones can stay whole and the larger ones only need to be halved, so they remain substantial after cooking.

    The important part is getting plenty of colour onto the mushrooms before adding any liquid.

    Once they’re properly browned, the red wine goes into the hot pan to pick up all of that flavour. There’s only a small amount, so instead of creating a sauce, it reduces quickly and coats the mushrooms along with a little Dijon, thyme and butter.

    It’s a simple side dish, but one where the cooking order makes a noticeable difference.

    Red Wine Glazed Mini King Oyster Mushrooms

    Prep 5 minutes
    Cook 10 minutes
    Mini king oyster mushrooms are ideal here because they can be left mostly whole, giving the finished dish a much better texture than thinly sliced mushrooms. Rather than making a red wine sauce, the wine is reduced almost completely in the pan. It picks up the browned mushroom fond and leaves behind a light, glossy coating.
    Course Side Dish
    Cuisine European inspired

    Ingredients

    • Mushrooms
    • 250 g mini king oyster mushrooms
    • 1 tbsp olive oil
    • 15 g unsalted butter
    • ¼ tsp salt
    • ½ tsp freshly cracked black pepper
    • Red Wine Glaze
    • 1 small shallot finely diced
    • 1 tsp minced garlic
    • 50 ml dry red wine
    • ½ tsp Dijon mustard
    • ¼ tsp dried thyme or 1–2 fresh thyme sprigs
    • 5 g cold unsalted butter

    Method

    1. Prepare the mushrooms
    2. Trim away only the very bottom of the stems if necessary.
    3. Leave the smallest mini king oyster mushrooms whole.
    4. Halve any noticeably larger mushrooms lengthways.
    5. Don’t thinly slice them. Part of the appeal of using mini king oysters is keeping their shape and giving them a substantial bite.
    6. Pat the mushrooms dry.
    7. Heat the pan
    8. Place a large frying pan over medium-high to high heat.
    9. Allow it to become properly hot before adding the olive oil.
    10. Add the mushrooms in a single layer.
    11. If possible, position the halved mushrooms cut-side down.
    12. Brown the mushrooms
    13. Leave the mushrooms relatively undisturbed for about 2–3 minutes.
    14. You want genuine golden-brown colour before you start tossing them around.
    15. Turn and cook for another 2–3 minutes, allowing the other surfaces to brown.
    16. If the mushrooms release moisture, continue cooking until the liquid has evaporated.
    17. Add butter and aromatics
    18. Reduce the heat slightly.
    19. Add 15 g butter, the shallot and thyme.
    20. Toss for approximately 1 minute, allowing the butter to coat the mushrooms and the shallot to begin softening.
    21. Add the garlic and cook for another 20–30 seconds.
    22. Season with the salt and black pepper.
    23. Deglaze with red wine
    24. Turn the heat back up to medium-high.
    25. Pour in the 50 ml red wine.
    26. As soon as it hits the pan, scrape the bottom to release all the browned mushroom fond.
    27. Add the Dijon mustard and stir it through the wine.
    28. Reduce
    29. Let the wine bubble vigorously while tossing the mushrooms occasionally.
    30. Cook for approximately 2–3 minutes, or until almost all of the free liquid has evaporated.
    31. Don’t stop while there’s still a puddle of red wine in the pan.
    32. You’re looking for a small amount of concentrated liquid clinging to the mushrooms.
    33. Finish with butter
    34. Turn off the heat.
    35. Add the final 5 g cold butter.
    36. Toss the mushrooms continuously as the butter melts into the reduced wine.
    37. The finished mushrooms should look dark, glossy and lightly glazed, rather than sitting in a sauce.
    38. Taste and adjust the salt and black pepper if necessary.
    39. Serve immediately.

    Tried this recipe?

    Let us know how it was!
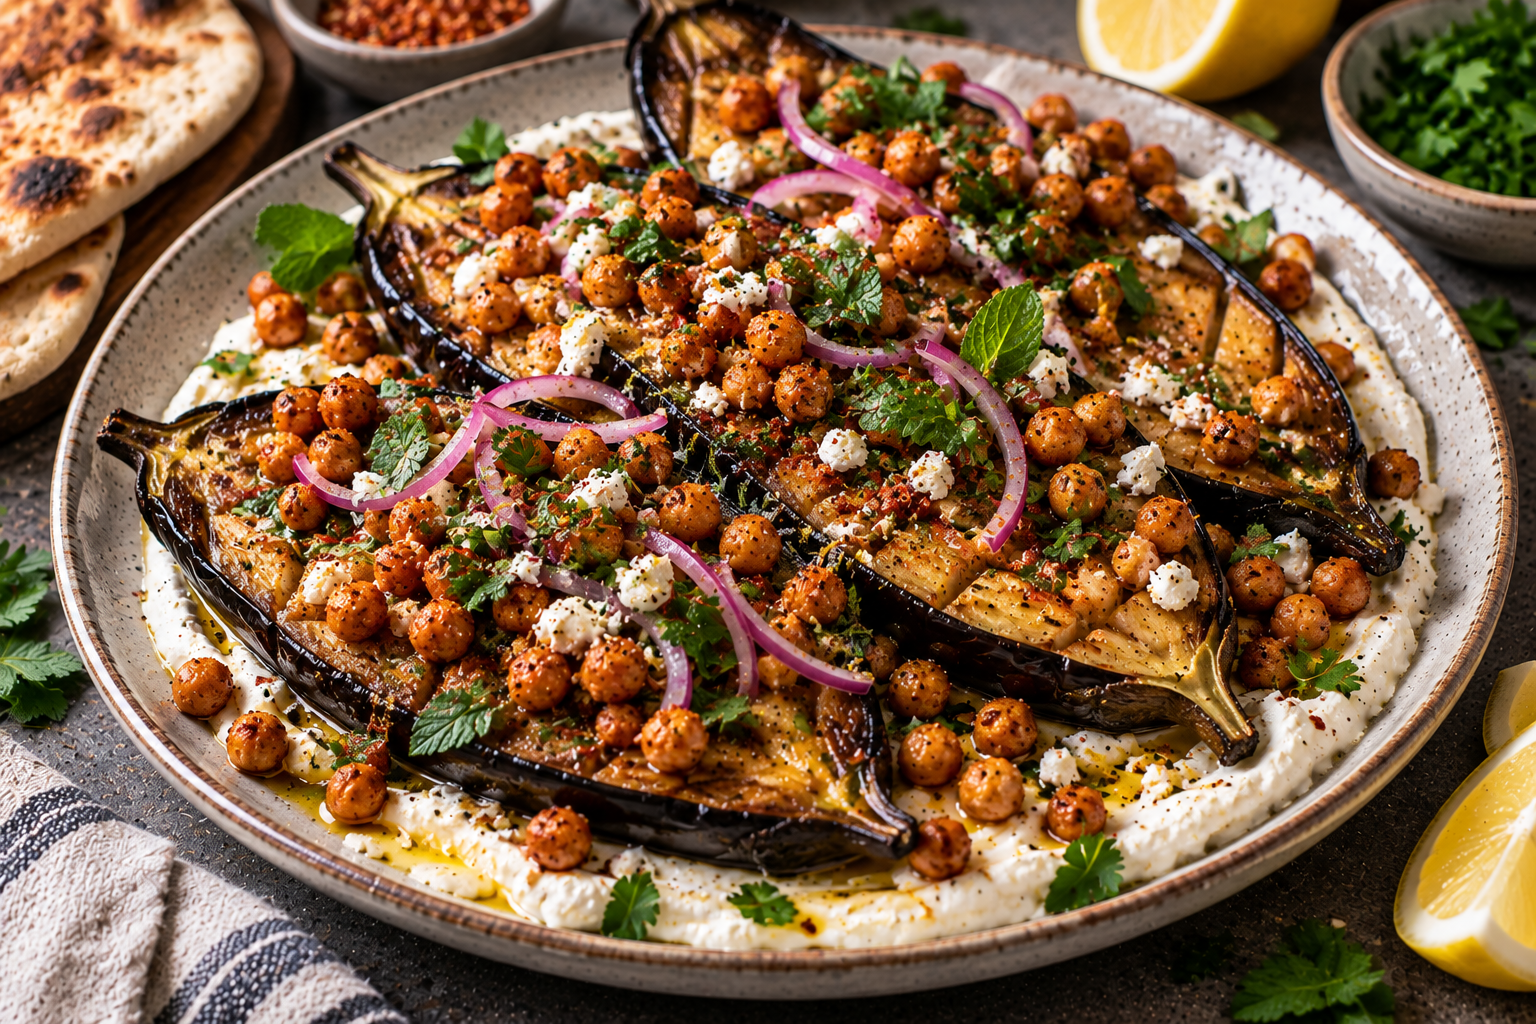
  • Roasted Eggplant with Whipped Feta, Chickpeas & Lemon

    Roasted Eggplant with Whipped Feta, Chickpeas & Lemon

    I’ve been wanting to add more recipes where the vegetable is actually the reason I’m making the dish, rather than something added alongside meat.

    Eggplant is particularly good for that because its texture changes so dramatically when it’s cooked properly.

    Undercooked eggplant can be firm, spongy and fairly uninteresting. Give it enough heat and time, though, and the inside becomes almost creamy while the cut surface develops plenty of colour.

    For this dish, that soft roasted eggplant sits over whipped feta and Greek yoghurt, then gets topped with chickpeas cooked until crisp around the edges with cumin and paprika.

    The chickpeas aren’t there simply because this is vegetarian and I felt like it needed a protein. They add a completely different texture against the soft eggplant and whipped feta.

    Then there’s red onion, parsley and lemon to cut through everything.

    There’s quite a bit happening on the finished plate, but none of the individual components is particularly difficult. Most of the cooking is simply giving the eggplant enough time to become properly soft and browned.

    Roasted Eggplant with Whipped Feta, Chickpeas & Lemon

    Prep 20 minutes
    Cook 30 minutes
    This vegetarian whole meal puts roasted eggplant at the centre rather than treating vegetables as a side dish. The eggplant is cooked until browned outside and almost creamy inside, then served over whipped feta and Greek yoghurt with crispy spiced chickpeas for texture. Fresh parsley, red onion and plenty of lemon keep the whole plate from becoming too rich.
    Servings 4
    Course Whole Meal
    Cuisine Mediterranean inspired

    Ingredients

    • Roasted Eggplant
    • 2 large eggplants about 700–800 g total
    • 2 tbsp extra virgin olive oil
    • ¾ tsp salt
    • ½ tsp black pepper
    • ½ tsp dried oregano
    • Crispy Chickpeas
    • 400 g can chickpeas drained and rinsed
    • 1 tbsp extra virgin olive oil
    • 1 tsp sweet paprika
    • ½ tsp ground cumin
    • ¼ tsp garlic powder
    • ¼ tsp salt
    • Black pepper
    • Whipped Feta
    • 150 g feta
    • 150 g Greek yoghurt
    • 1 tbsp extra virgin olive oil
    • 1 tbsp lemon juice
    • Black pepper
    • Garlic Lemon Oil
    • 1½ tbsp extra virgin olive oil
    • 1 tbsp lemon juice
    • 1 small garlic clove finely grated
    • ¼ tsp dried oregano
    • Pinch of salt
    • To Finish
    • ¼ small red onion very thinly sliced
    • 2 tbsp roughly chopped flat-leaf parsley
    • 1 tbsp chopped fresh mint optional
    • Lemon wedges
    • Extra virgin olive oil optional
    • Chilli flakes optional

    Method

    1. Prepare the eggplant
    2. Preheat the oven to 220°C conventional / 200°C fan.
    3. Cut the eggplants in half lengthways.
    4. Using a small knife, score the flesh in a diamond pattern, cutting fairly deeply without piercing through the skin.
    5. Brush the cut surfaces with olive oil.
    6. Season with salt, black pepper and oregano.
    7. Start cut-side down
    8. Place the eggplants cut-side down on a lined baking tray.
    9. Roast for approximately 20 minutes.
    10. Starting them this way helps trap steam inside while putting the cut surface directly against the hot tray.
    11. Turn and finish roasting
    12. Turn the eggplants cut-side up.
    13. Continue roasting for another 10–15 minutes until the flesh is completely tender and the surface has developed plenty of colour.
    14. A knife should slide through the thickest section with almost no resistance.
    15. If the eggplant still feels firm or springy, keep cooking it.
    16. For this dish, I’d rather take the eggplant slightly further than pull it out too early.
    17. Make the Crispy Chickpeas
    18. Dry them properly
    19. While the eggplant cooks, drain and rinse the chickpeas.
    20. Spread them over paper towel or a clean tea towel and dry them thoroughly.
    21. Remove any loose skins if they’re coming away easily, but I wouldn’t spend ten minutes peeling every chickpea.
    22. Season
    23. Combine the chickpeas with:
    24. Olive oil
    25. Sweet paprika
    26. Cumin
    27. Garlic powder
    28. Salt
    29. Black pepper
    30. Toss until evenly coated.
    31. Roast until crisp
    32. Spread them over a separate baking tray in a single layer.
    33. Roast for approximately 20–25 minutes, shaking the tray once or twice.
    34. They should be browned and crisp around the outside.
    35. They’ll become slightly firmer as they cool.
    36. Make the Whipped Feta
    37. Blend
    38. Add the feta, Greek yoghurt, olive oil, lemon juice and black pepper to a small food processor.
    39. Blend until smooth and creamy.
    40. Scrape down the sides as necessary.
    41. Depending on your feta and yoghurt, this should take around 1–2 minutes.
    42. Taste before adding any salt.
    43. Feta usually provides more than enough.
    44. Adjust the texture
    45. If the whipped feta seems extremely thick, add:
    46. 1 teaspoon water
    47. and blend again.
    48. Repeat only if necessary.
    49. I want it soft enough to spread across the plate, but not so loose that the eggplant disappears into yoghurt.
    50. Make the Garlic Lemon Oil
    51. Combine
    52. Mix the olive oil, lemon juice, grated garlic, oregano and a small pinch of salt.
    53. Leave it for 5–10 minutes while everything else finishes.
    54. There’s no honey or sugar in this dressing.
    55. The eggplant becomes naturally sweeter as it roasts, and the feta already provides plenty of richness. I want the lemon to stay sharp enough to cut through both.
    56. Assemble
    57. Start with the whipped feta
    58. Spread the whipped feta generously across a large serving plate.
    59. Don’t cover the entire plate in a thin layer. Keep it reasonably thick underneath where the eggplant will sit.
    60. Add the eggplant
    61. Place the roasted eggplant halves over the whipped feta, cut-side up.
    62. You can serve them as four individual halves or arrange everything together on one large platter.
    63. Add the chickpeas
    64. Scatter the crispy chickpeas generously over and around the eggplant.
    65. Some will inevitably fall into the whipped feta.
    66. That’s exactly where I want them.
    67. Finish
    68. Scatter over the thinly sliced red onion, parsley and optional mint.
    69. Spoon the garlic-lemon oil over the eggplant.
    70. Finish with black pepper and optional chilli flakes.
    71. Serve with lemon wedges.

    Tried this recipe?

    Let us know how it was!